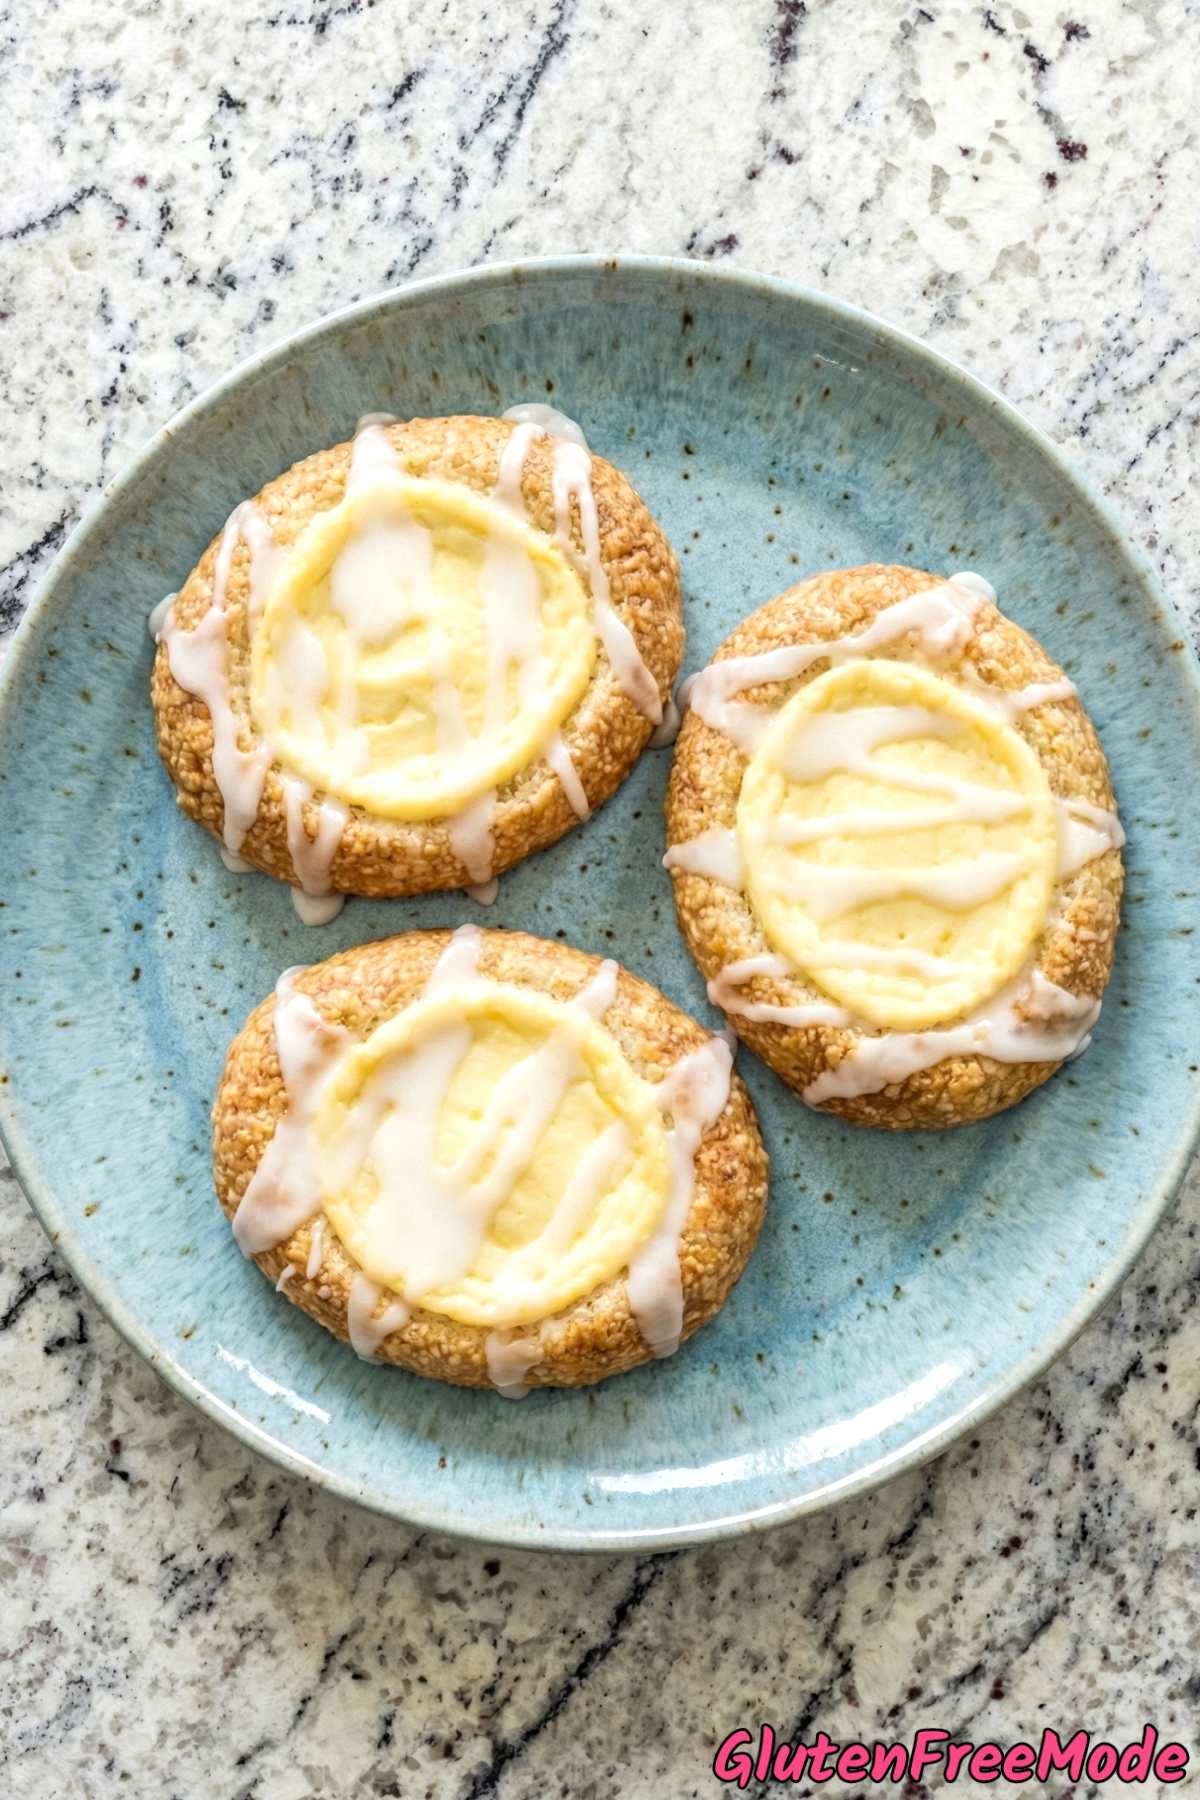
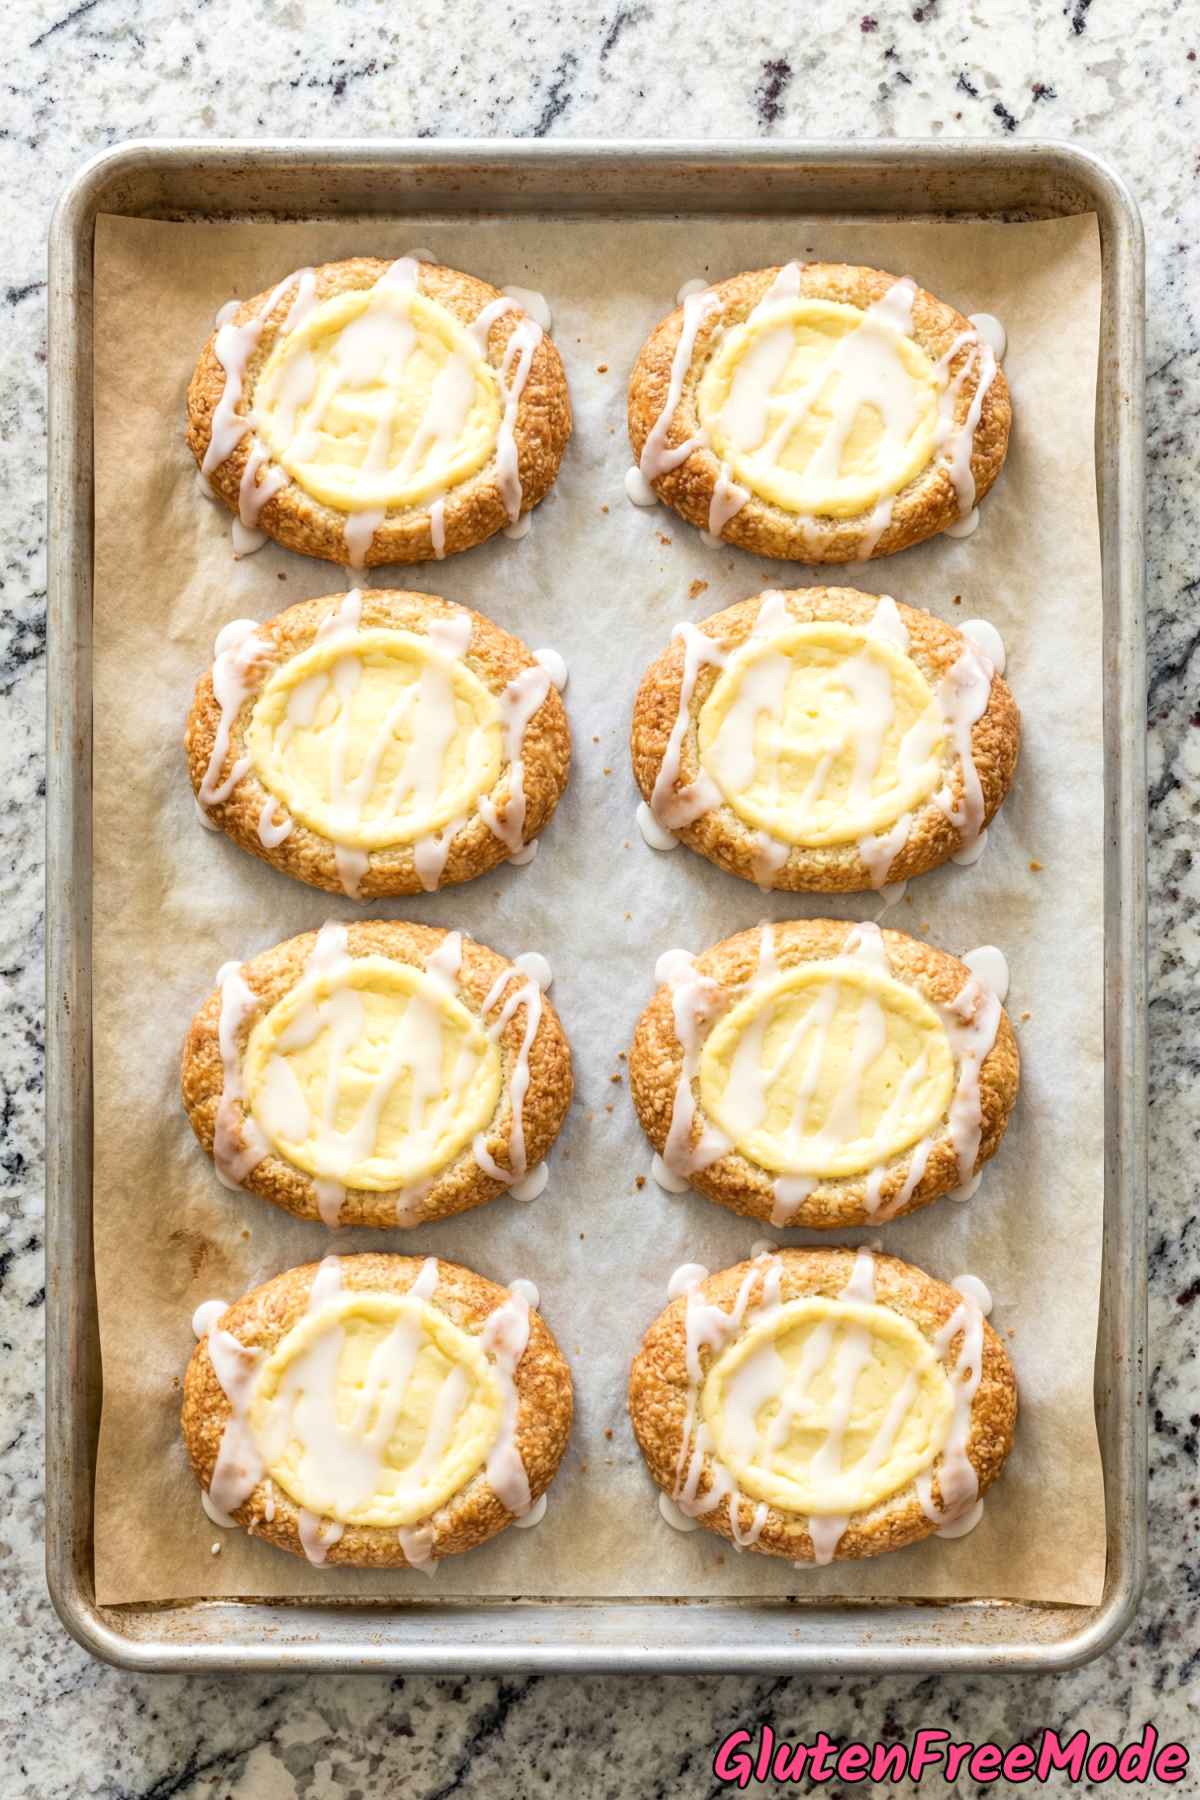
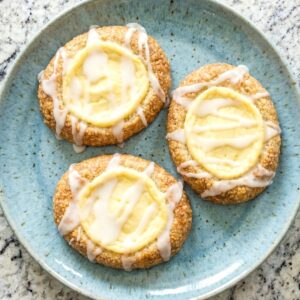
These gluten free cheese danish pastries are one of my favorite things to bake. They’re flaky, creamy, and taste just like the ones you’d find at a bakery.
The dough comes together quickly with a simple biscuit-style method. No yeast, no long rising times, and no complicated folding – just mix, shape, fill, and bake.
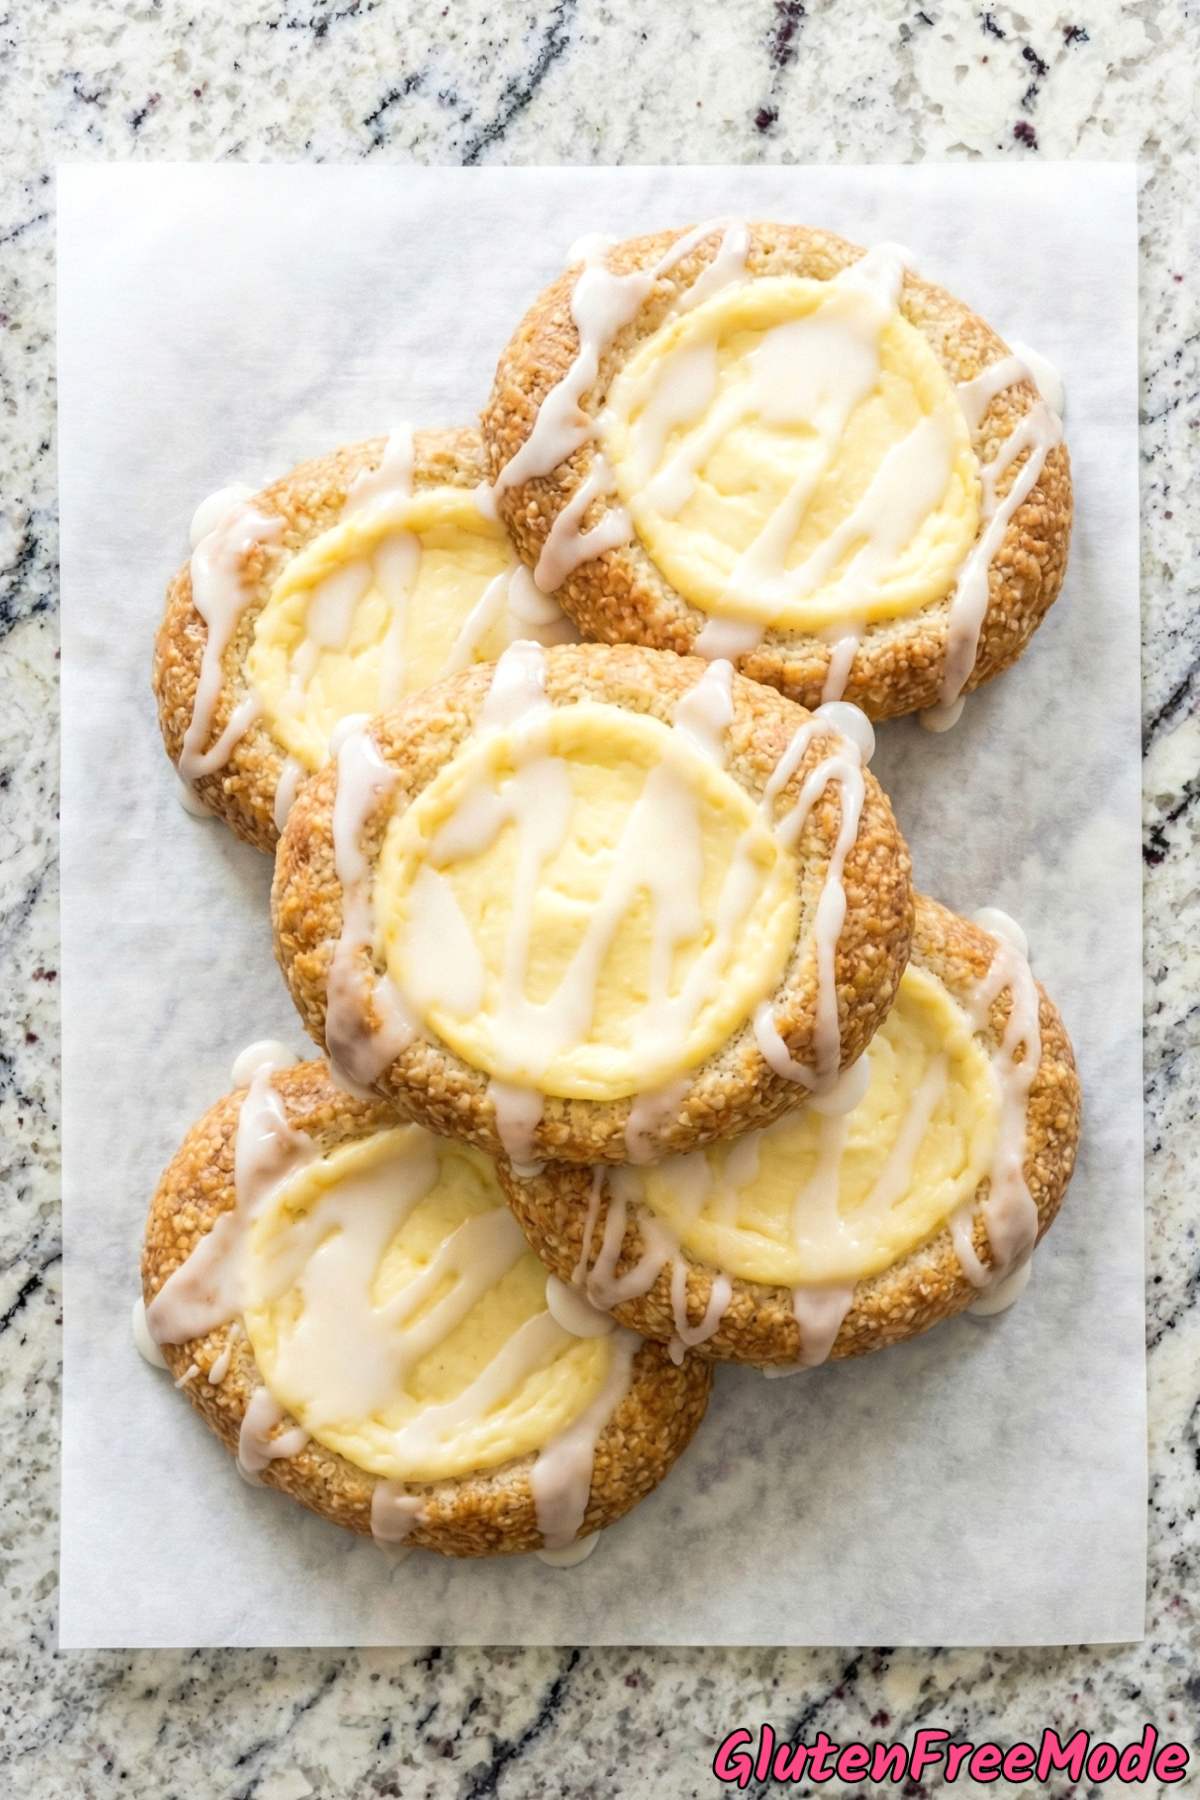
The cream cheese filling is smooth and slightly sweet, and it pairs perfectly with the buttery pastry. A simple powdered sugar glaze on top finishes everything off nicely.
Best of all, they’re 100% gluten free. If you’ve been missing pastries like this since going gluten free, this recipe is definitely for you.
You can have these ready in about 30 minutes, which makes them great for a weekend breakfast or a simple treat any day of the week.
Why You’ll Love This Recipe
It’s Gluten Free and Actually Flaky – One of the biggest struggles with gluten free baking is getting that light, flaky pastry texture. This cheese danish recipe uses cold butter cut into the dough to create those buttery, tender layers you thought you had to give up.
Ready in Under 30 Minutes – From mixing the dough to pulling golden pastries out of the oven, this whole recipe takes less than 30 minutes of active work. That’s faster than driving to a bakery and way more satisfying.
No Yeast Required – Traditional danish pastries need yeast, proofing time, and a lot of patience. This recipe skips all of that by using baking powder instead, which means no waiting around for dough to rise and no stressing about whether your yeast is still active.
That Cream Cheese Filling is Incredible – The filling is a smooth, slightly sweet cream cheese mixture made with vanilla and egg yolk. It gets beautifully set in the oven and tastes like the real bakery-style cheese danish filling you remember.
Ingredients
For the Dough
- 2 cups Gluten Free 1-to-1 Baking Flour
- 3 tbsp Granulated Sugar
- 2 tsp Baking Powder
- 1/4 tsp Salt
- 1/3 cup Cold Unsalted Butter, cubed
- 1/2 cup Cold Whole Milk
- 1 large Egg
- 1 tsp Vanilla Extract
For the Filling
- 8 oz Cream Cheese, softened
- 1/4 cup Granulated Sugar
- 1 large Egg Yolk
- 1 tsp Vanilla Extract
For the Glaze
- 1 cup Powdered Sugar
- 1 1/2 tbsp Whole Milk
How to Make
Step 1
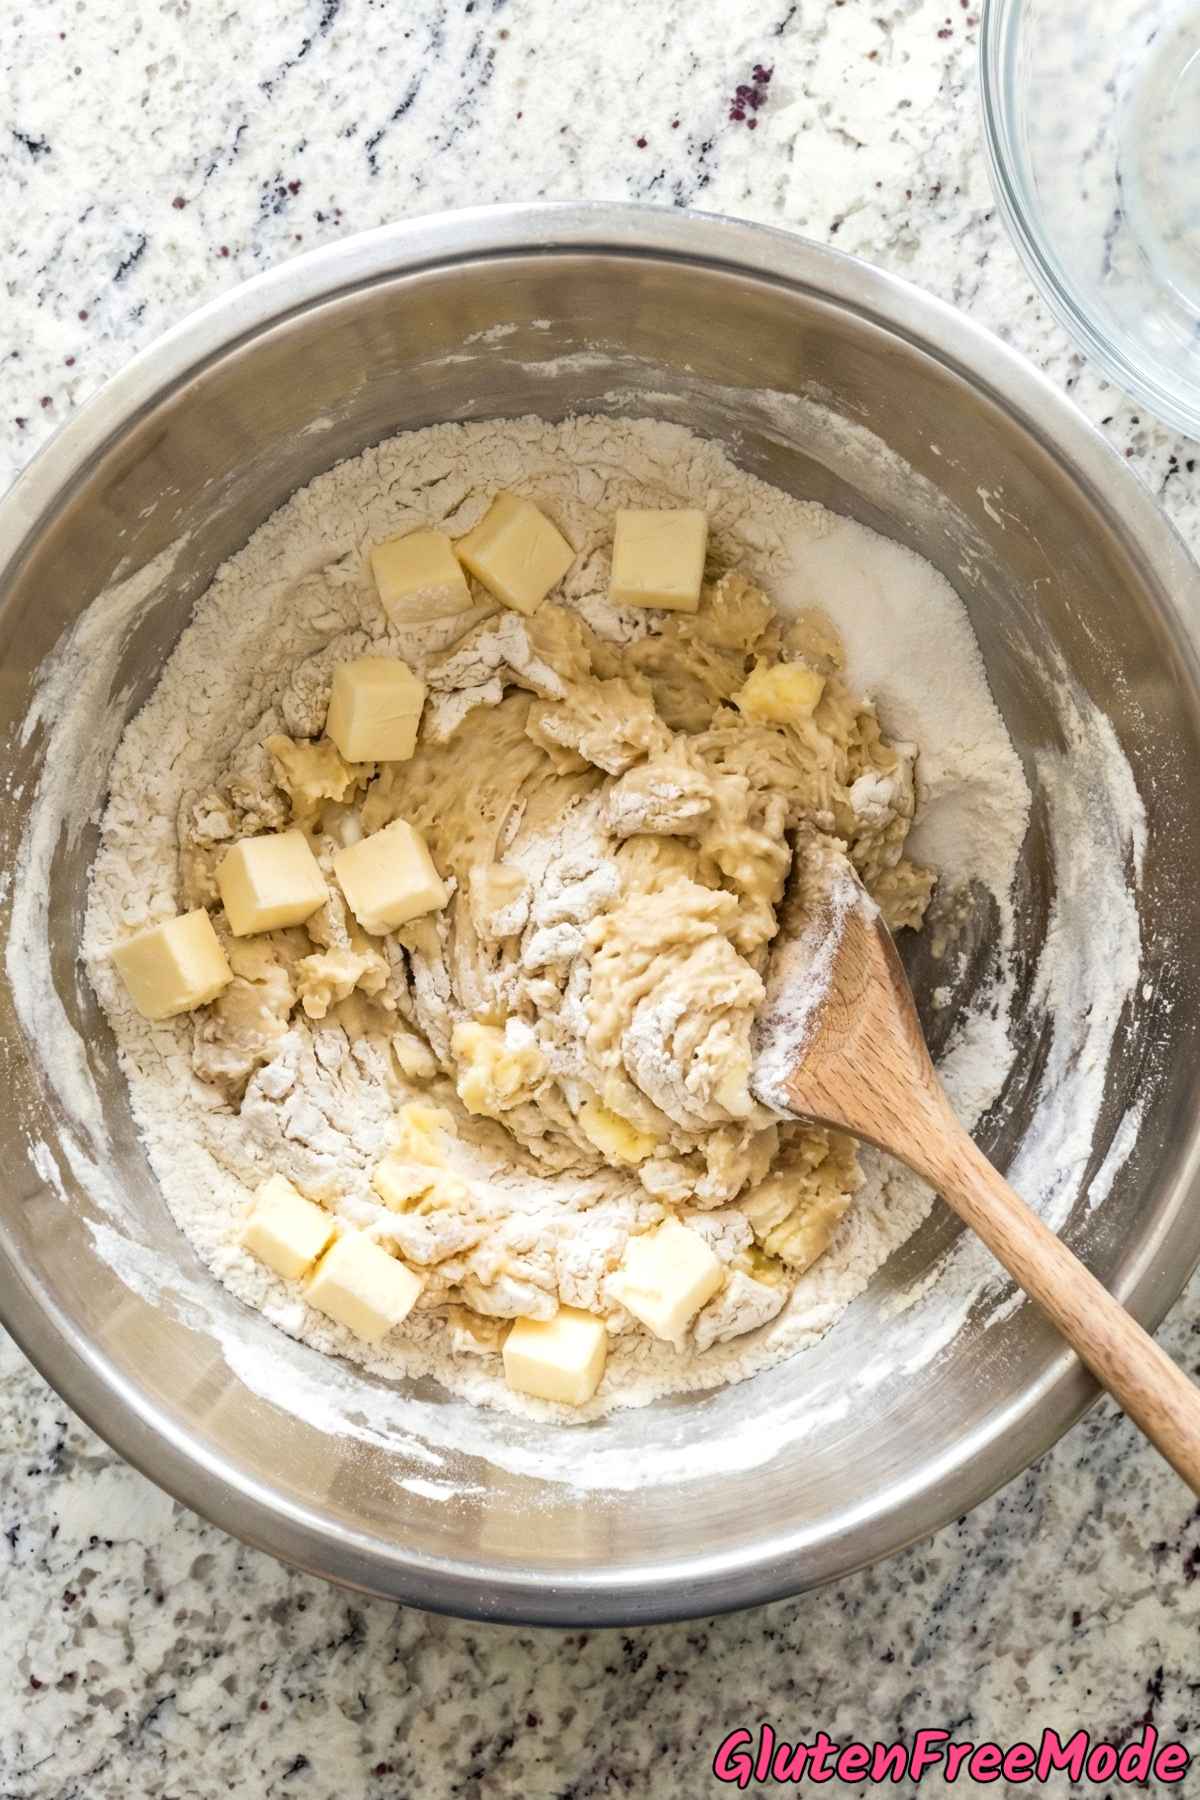
Preheat oven to 375F and line a baking sheet with parchment paper. In a large bowl, whisk together gluten free flour, sugar, baking powder, and salt. Cut in cold butter using a pastry cutter until the mixture resembles coarse crumbs.
Step 2
In a small bowl, whisk together cold milk, egg, and vanilla extract. Pour into the flour mixture and stir until a soft dough forms. Turn dough out onto a surface dusted with gluten free flour.
Step 3
Make the filling by beating cream cheese, sugar, egg yolk, and vanilla extract until smooth and creamy.

Step 4
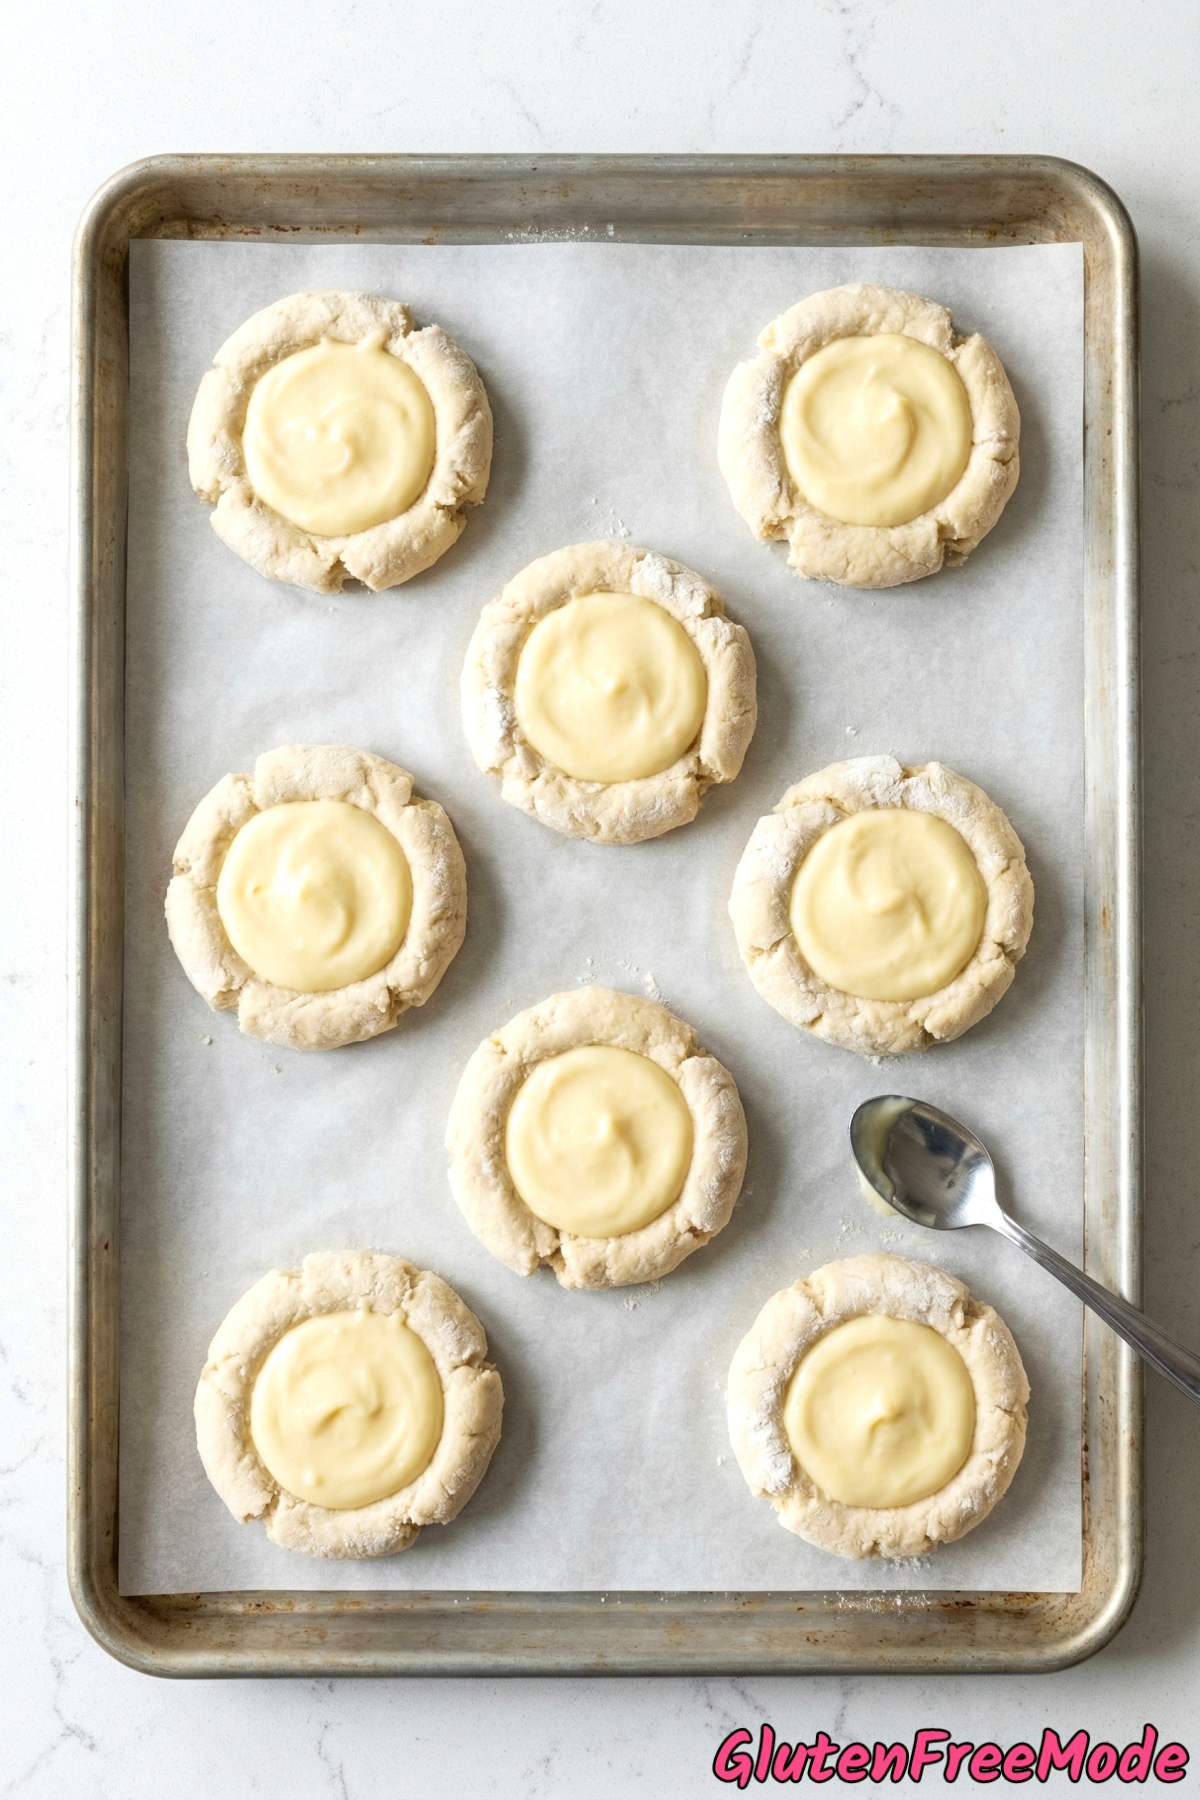
Divide dough into 8 equal portions. Flatten each into a rough 4-inch round and place on the prepared baking sheet. Use the back of a spoon to create an indent in the center of each round and fill with 1 to 2 tablespoons of the cream cheese filling.
Step 5
Bake for 16 to 18 minutes until the edges are golden and the filling is set. Let cool on the pan for 10 minutes.
Step 6
Whisk powdered sugar and milk together until smooth and drizzle over the warm pastries. Serve once the glaze sets.
Helpful Tips
Keep Your Butter Really Cold
The butter needs to be cold when you cut it into the flour mixture. If it warms up and gets soft, it will blend too much into the flour and you won’t get that flaky, tender texture in the pastry.

Cut your butter into small cubes and put it back in the fridge for about 10 minutes before you start working with it. This gives you more time before it starts warming up in your hands.
If you’re working in a warm kitchen, you can even toss the cubed butter in the freezer for 5 minutes. That little extra chill makes a real difference in how the dough turns out.
Don’t Overwork the Dough
Once you pour the wet ingredients into the flour mixture, stir just until everything comes together into a soft dough. If you keep mixing or kneading it too much, the pastries will turn out dense and tough instead of light and tender.

Gluten free dough is a bit stickier than regular dough, so it might look like it needs more mixing. It doesn’t. As soon as there are no dry patches of flour left and it holds together, stop and move on.
When you turn it out onto your floured surface, just gently pat it together. A few small streaks of butter in the dough are totally fine and actually a good sign.
Make the Indents Deep Enough
When you press the back of a spoon into each dough round, make sure the indent is deep and wide enough to actually hold the filling. If it’s too shallow, the cream cheese mixture will spread out and run off the sides while baking.
Push down firmly to create a well that goes about halfway through the thickness of the dough, and leave a border of about half an inch around the edge. Think of it like building a little wall to hold everything in place.
If the dough sticks to your spoon, lightly dust the back of the spoon with a bit of gluten free flour first. That makes shaping the indent much easier.
You Might Also Like
- Gluten Free Fluffy Cinnamon Rolls
- Gluten Free Strawberry Toaster Pastries
- Gluten Free Cranberry White Chocolate Scones
- Gluten Free Lemon & Cream Cheese Pound Cake
- Gluten Free Strawberry Cheesecake Bars
Frequently Asked Questions
Why does the butter need to be cold?
Cold butter is the secret to getting that slightly flaky, pastry-like texture in the dough. When small pieces of cold butter hit the hot oven, they melt and create little pockets of steam, which gives the danish a lighter, more layered feel.
If the butter is soft or at room temperature, it will blend completely into the flour and the pastries will turn out more dense and flat. For best results, cube the butter and pop it back in the fridge for a few minutes before cutting it into the flour.
Gluten Free Cheese Danish Pastries
Equipment
- pastry cutter
Ingredients
For the Dough
- 2 cups Gluten Free 1-to-1 Baking Flour
- 3 tbsp Granulated Sugar
- 2 tsp Baking Powder
- 1/4 tsp Salt
- 1/3 cup Cold Unsalted Butter, cubed
- 1/2 cup Cold Whole Milk
- 1 large Egg
- 1 tsp Vanilla Extract
For the Filling
- 8 oz Cream Cheese, softened
- 1/4 cup Granulated Sugar
- 1 large Egg Yolk
- 1 tsp Vanilla Extract
For the Glaze
- 1 cup Powdered Sugar
- 1 1/2 tbsp Whole Milk
Instructions
- Preheat oven to 375F and line a baking sheet with parchment paper. In a large bowl, whisk together gluten free flour, sugar, baking powder, and salt. Cut in cold butter using a pastry cutter until the mixture resembles coarse crumbs.
- In a small bowl, whisk together cold milk, egg, and vanilla extract. Pour into the flour mixture and stir until a soft dough forms. Turn dough out onto a surface dusted with gluten free flour.
- Make the filling by beating cream cheese, sugar, egg yolk, and vanilla extract until smooth and creamy.
- Divide dough into 8 equal portions. Flatten each into a rough 4-inch round and place on the prepared baking sheet. Use the back of a spoon to create an indent in the center of each round and fill with 1 to 2 tablespoons of the cream cheese filling.
- Bake for 16 to 18 minutes until the edges are golden and the filling is set. Let cool on the pan for 10 minutes.
- Whisk powdered sugar and milk together until smooth and drizzle over the warm pastries. Serve once the glaze sets.