If you haven’t tried mochi cake before, you’re in for a treat. It’s chewy, dense, and has this amazing texture that’s completely different from regular cake.
This gluten free browned butter mochi cake takes things up a notch by using browned butter. That nutty, toasty flavor makes a huge difference and pairs so well with the coconut.
The base of this cake is mochiko sweet rice flour, which is naturally gluten free. So this isn’t one of those recipes where you’re swapping out flour and hoping for the best. It’s meant to be made this way.
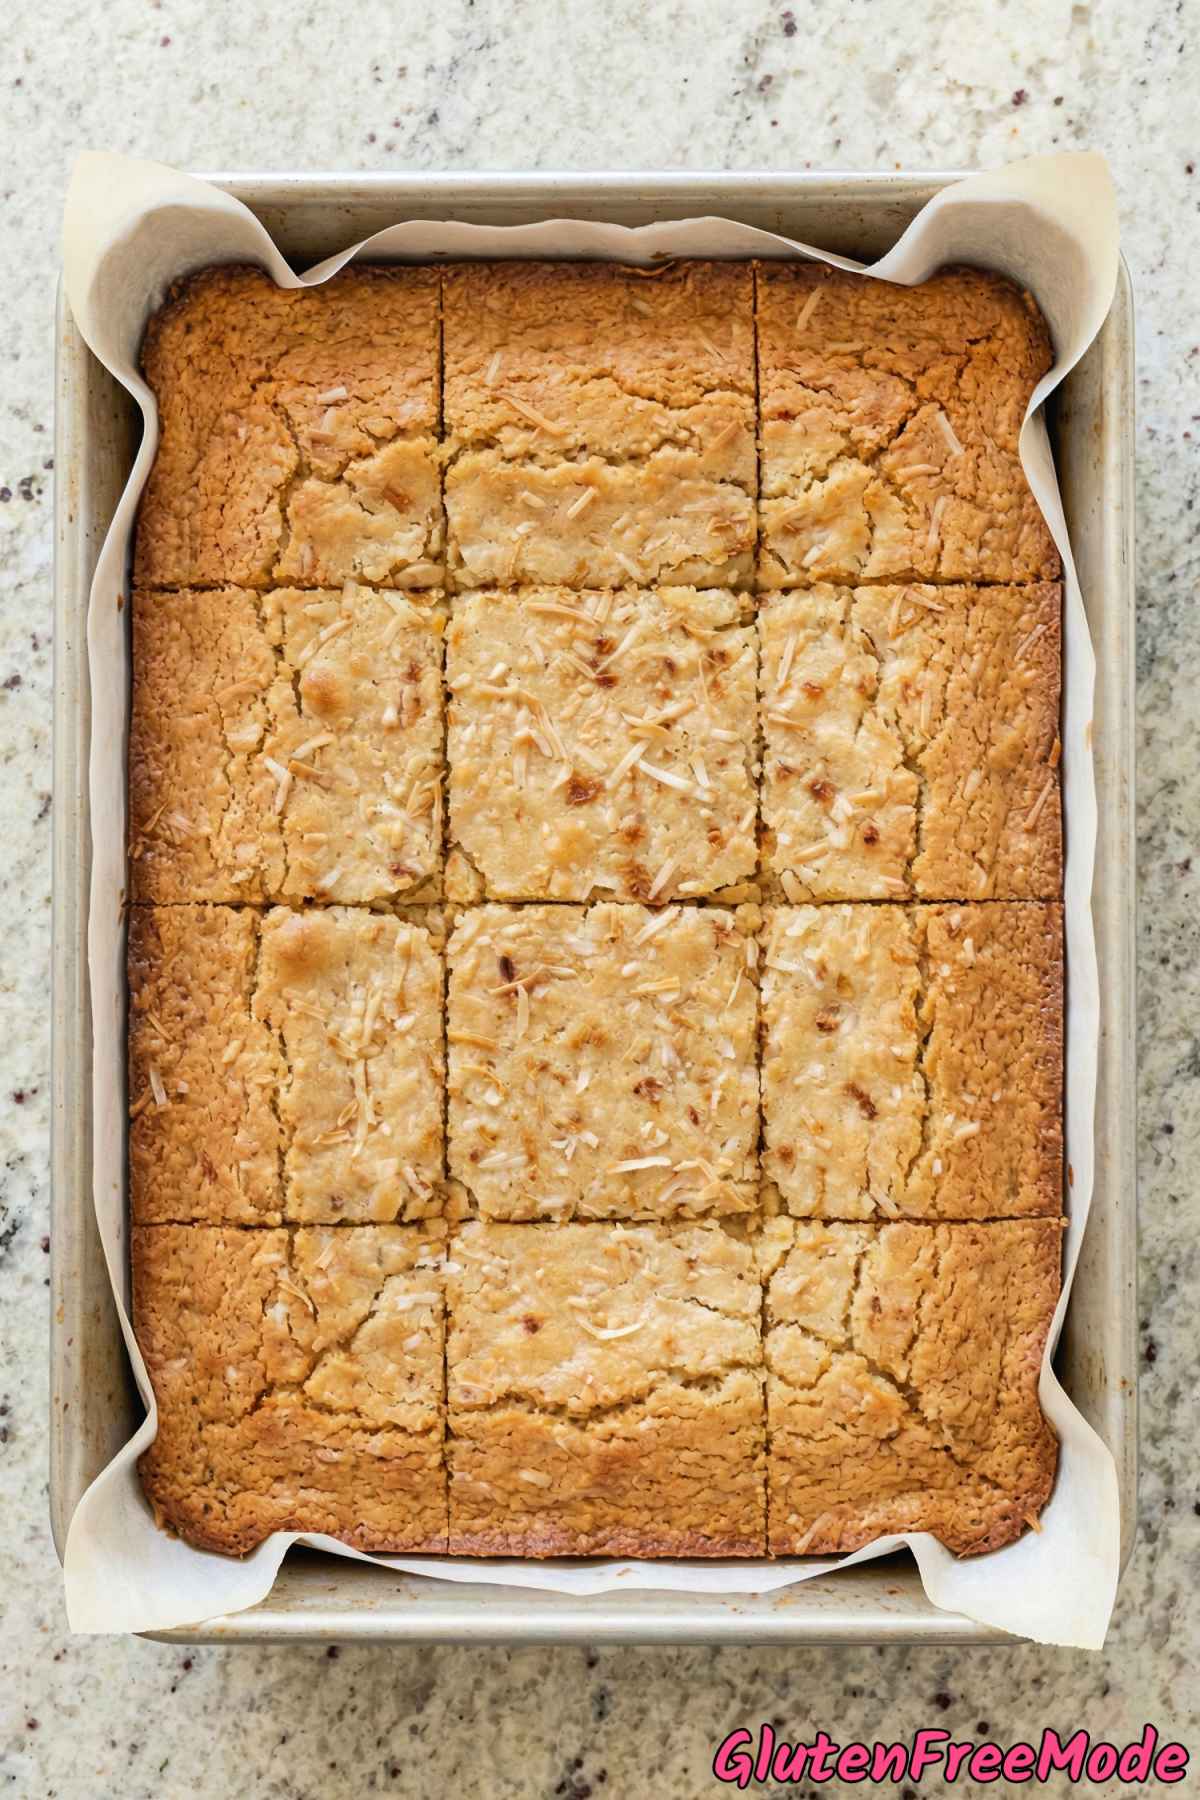
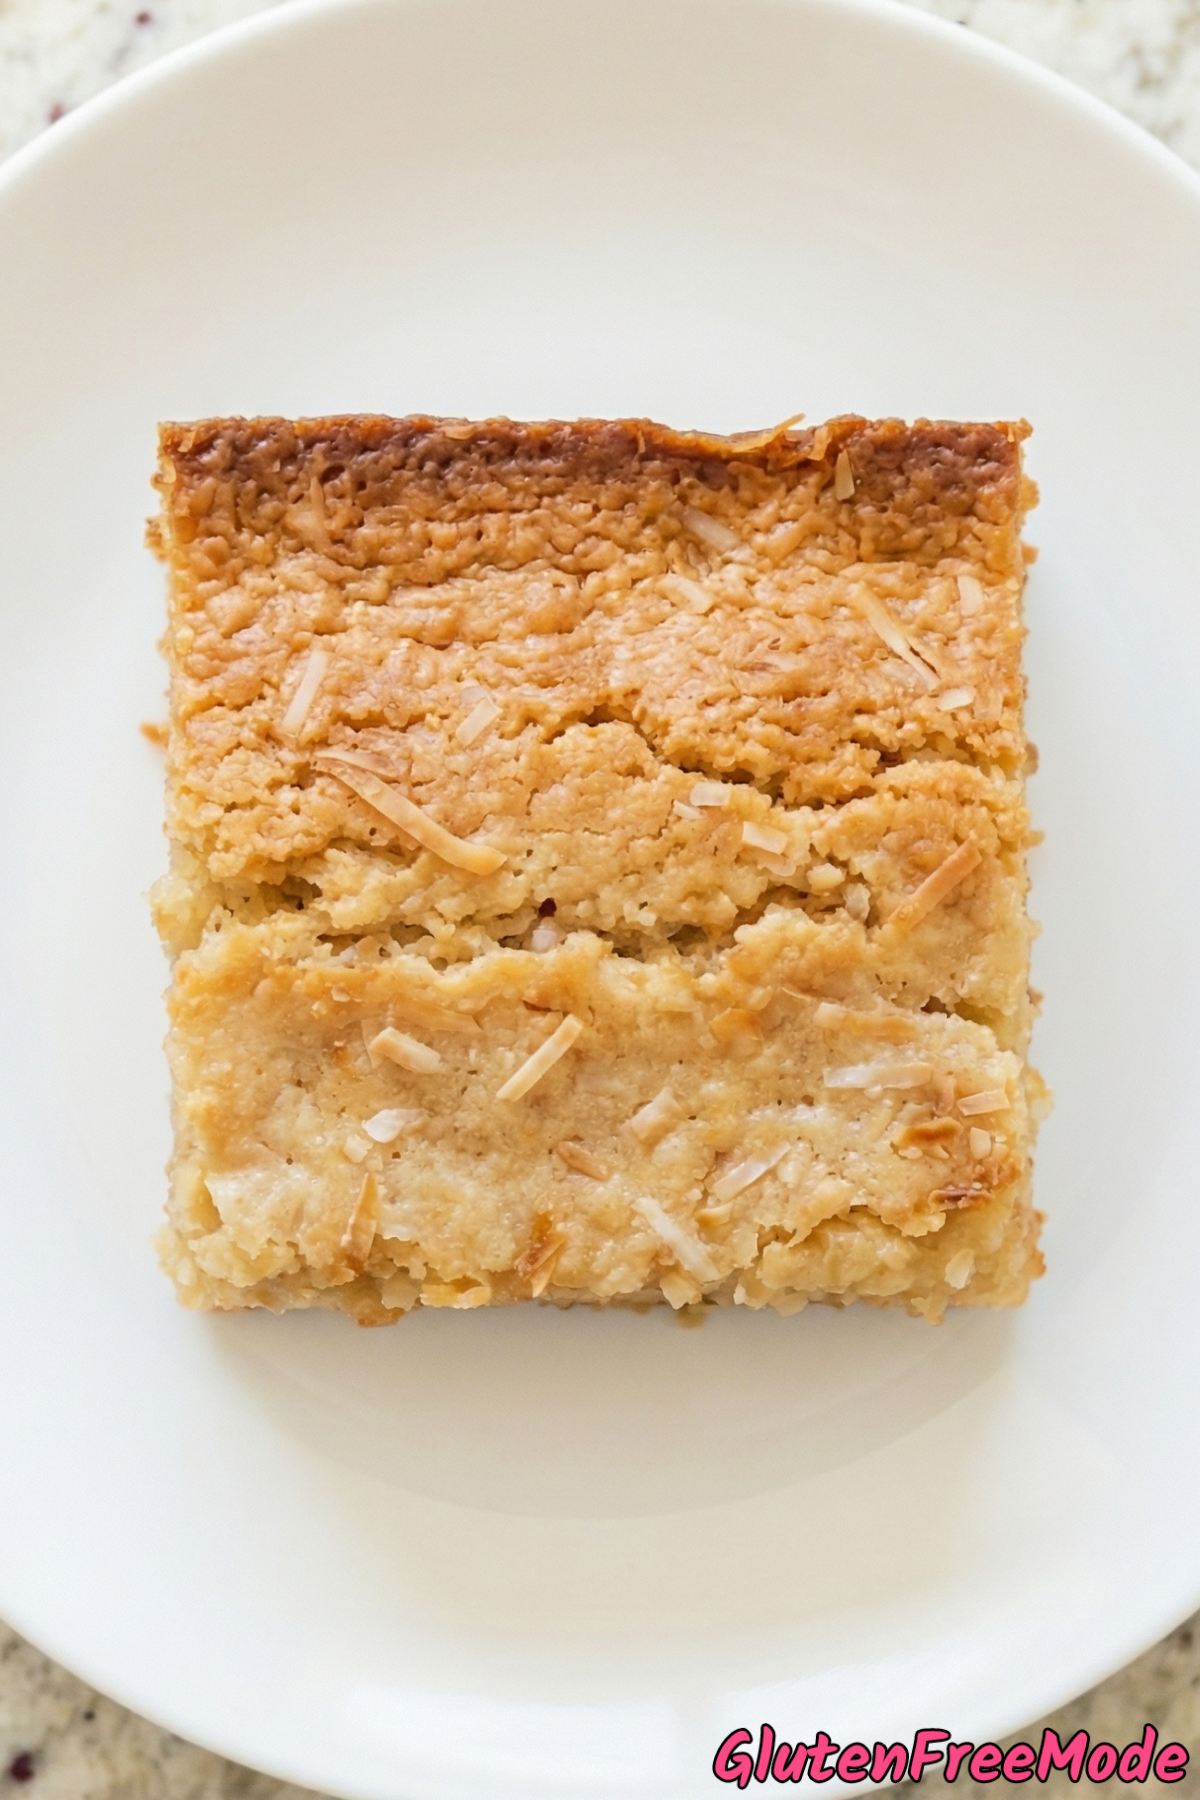
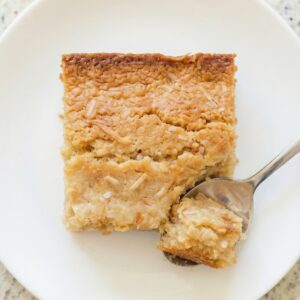
The texture is the real star here. Crispy edges, a chewy center, and it honestly gets better as it sits at room temperature.
It’s simple to throw together and you don’t need any fancy equipment. One bowl for dry, one for wet, mix them up, and bake. That’s basically it.
Why You’ll Love This Recipe
Naturally Gluten Free – This cake uses mochiko sweet rice flour instead of regular flour, so it’s naturally gluten free without needing any complicated flour blends or substitutions.
That Browned Butter Flavor – Browning the butter adds a rich, nutty flavor that takes this mochi cake to a whole new level compared to regular mochi cake recipes that just use melted butter.
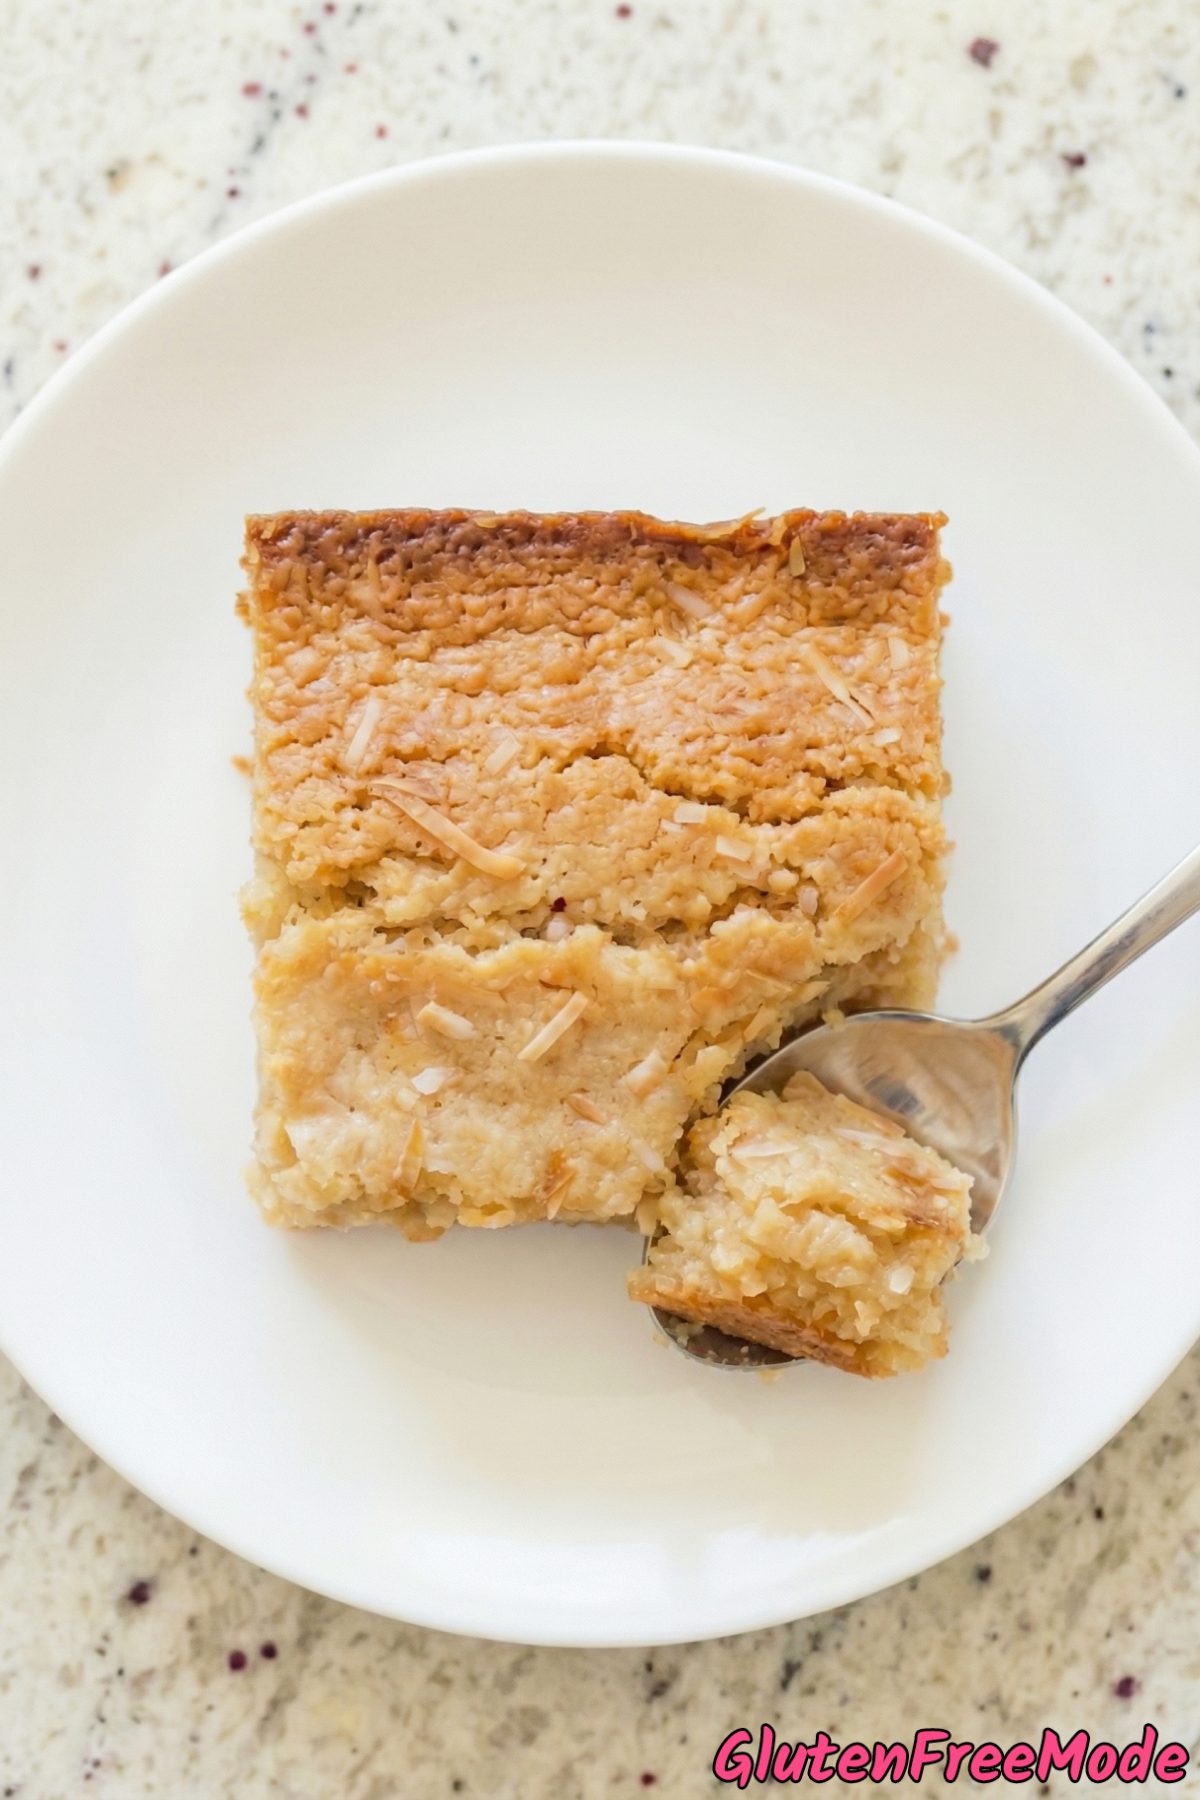
The Texture Is Unreal – Thanks to the mochiko flour, this cake is chewy, dense, and almost bouncy on the inside with perfectly crispy golden edges that make every bite interesting.
Coconut Lovers Will Obsess – With both full-fat coconut milk in the batter and sweetened shredded coconut folded in, you get a double hit of tropical coconut flavor in every square.
Ingredients
- 1/2 cup Unsalted Butter
- 2 cups Mochiko Sweet Rice Flour
- 1 1/2 cups Granulated Sugar
- 1 tsp Baking Powder
- 1/2 tsp Fine Sea Salt
- 1 (13.5 oz) can Full-Fat Coconut Milk
- 3 Large Eggs
- 2 tsp Vanilla Extract
- 1 cup Sweetened Shredded Coconut
How to Make
Step 1
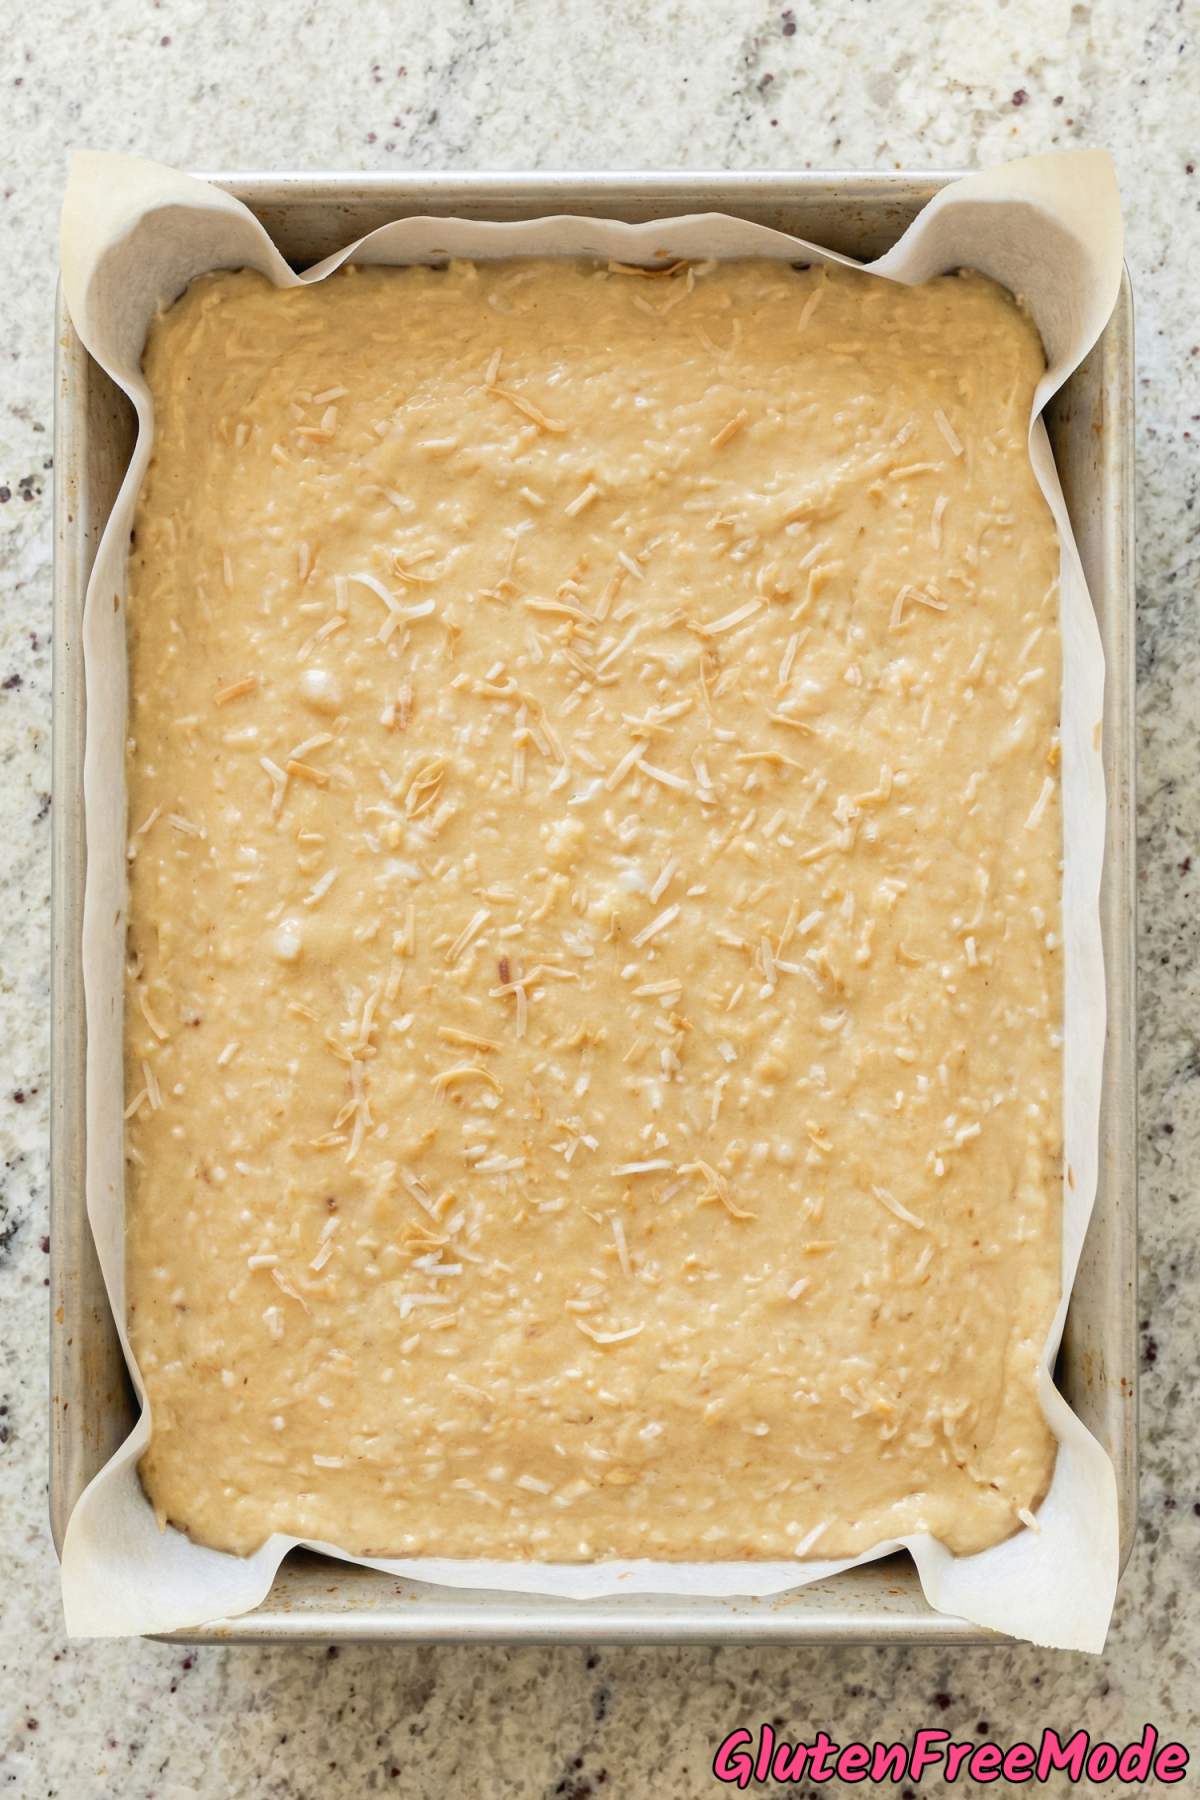
Preheat your oven to 350°F. Grease a 9×13-inch baking pan and line it with parchment paper, leaving an overhang on two sides for easy removal.
Step 2
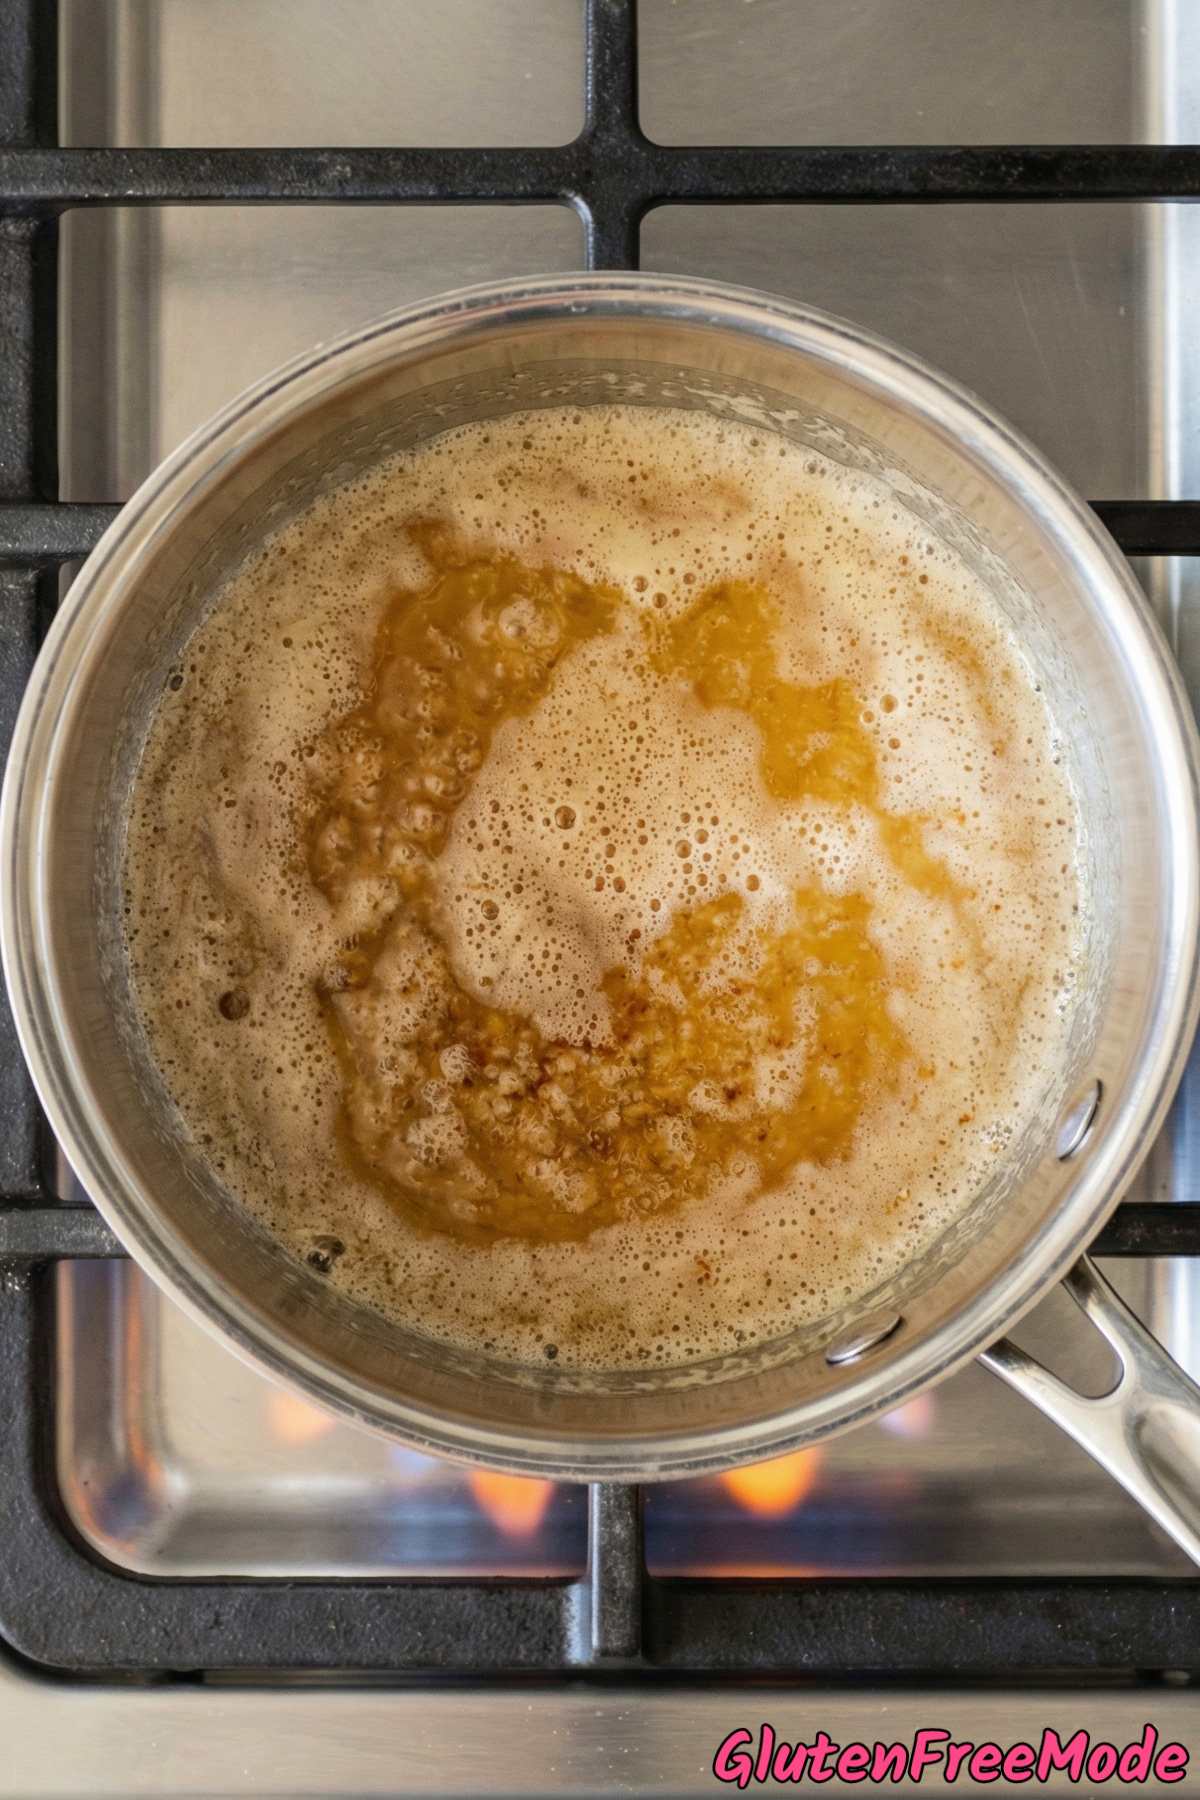
In a small saucepan, melt the butter over medium heat, swirling the pan occasionally. Continue cooking until the butter turns golden amber and smells nutty, about 5 minutes. Watch carefully to avoid burning. Remove from heat and let cool slightly.
Step 3
In a large bowl, whisk together the mochiko sweet rice flour, granulated sugar, baking powder, and salt until evenly combined.
Step 4
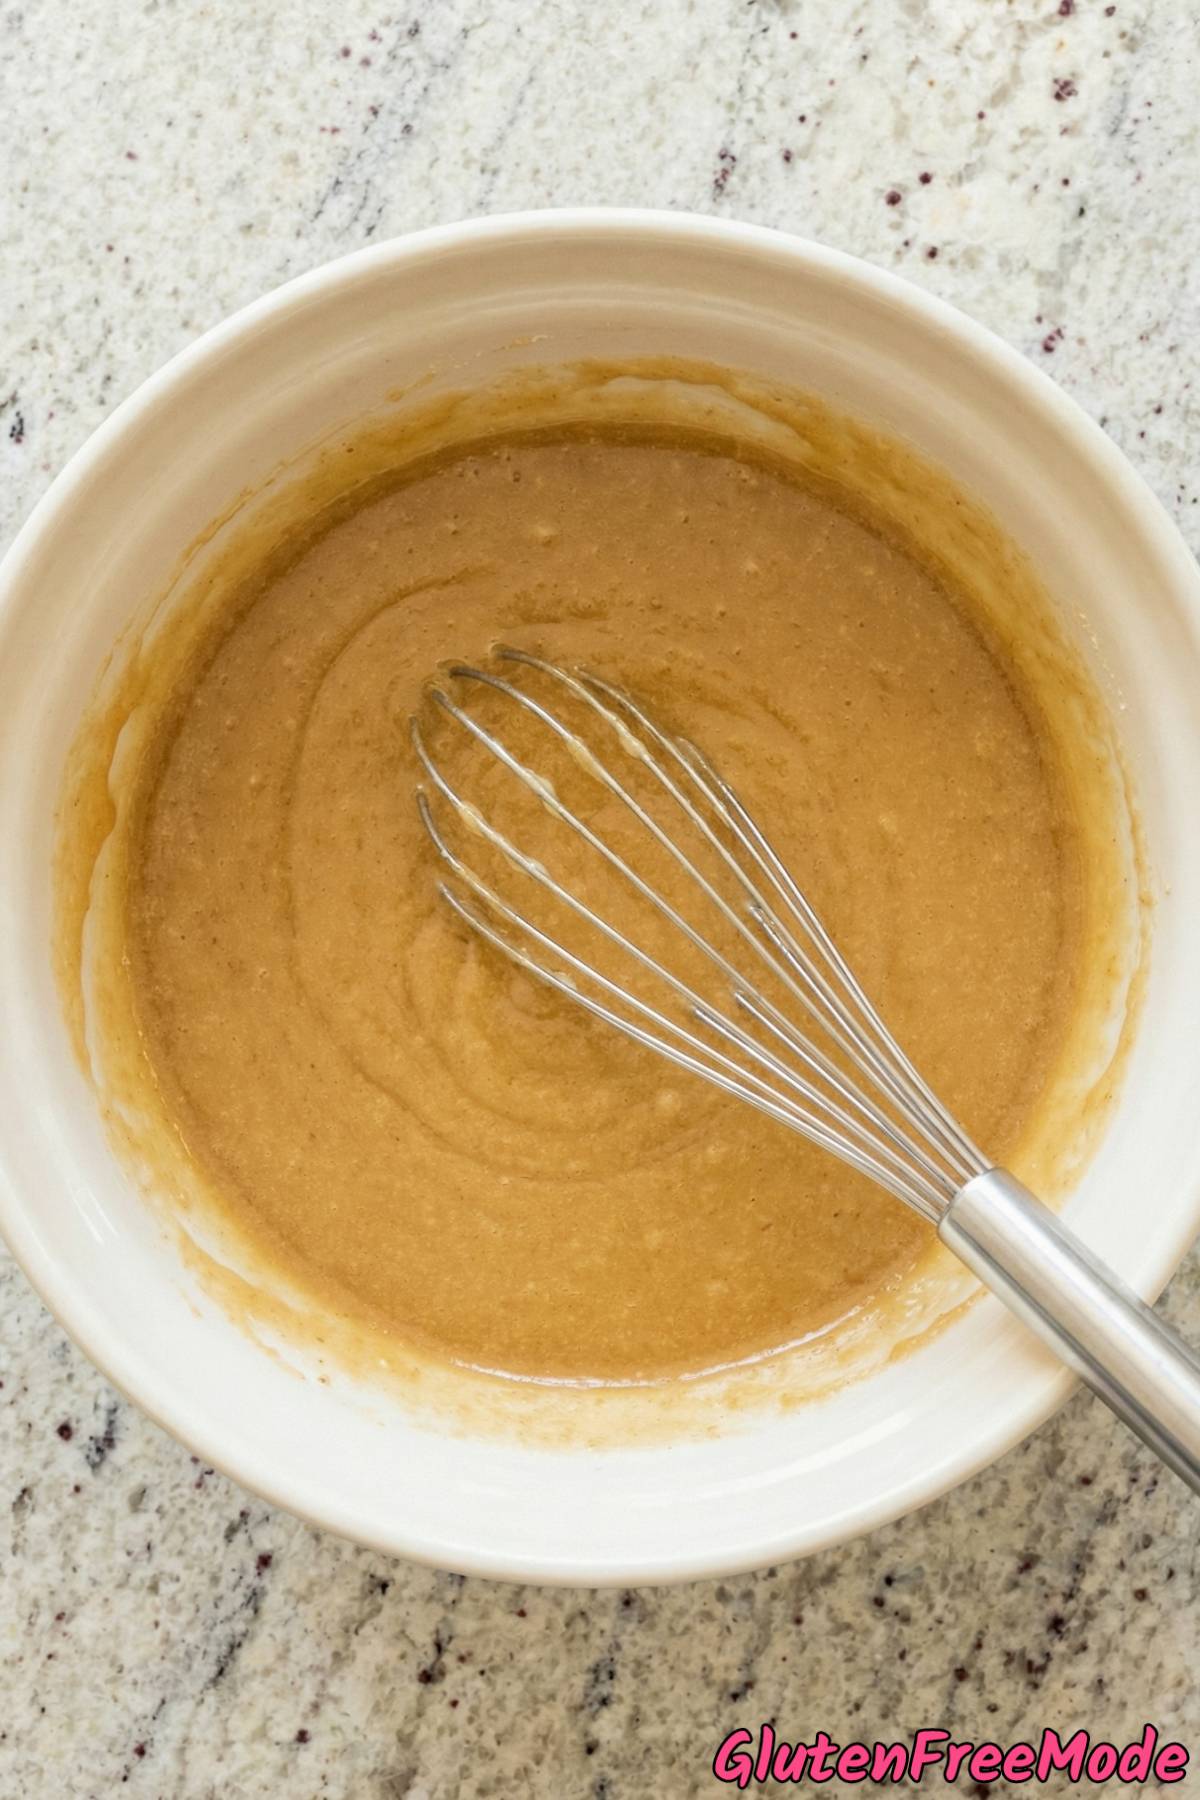
In a separate bowl, whisk together the coconut milk, eggs, browned butter, and vanilla extract until smooth. Pour the wet mixture into the dry ingredients and stir until a smooth, pourable batter forms with no lumps.
Step 5
Fold in the sweetened shredded coconut until evenly distributed throughout the batter. Pour into the prepared pan and spread into an even layer.
Step 6
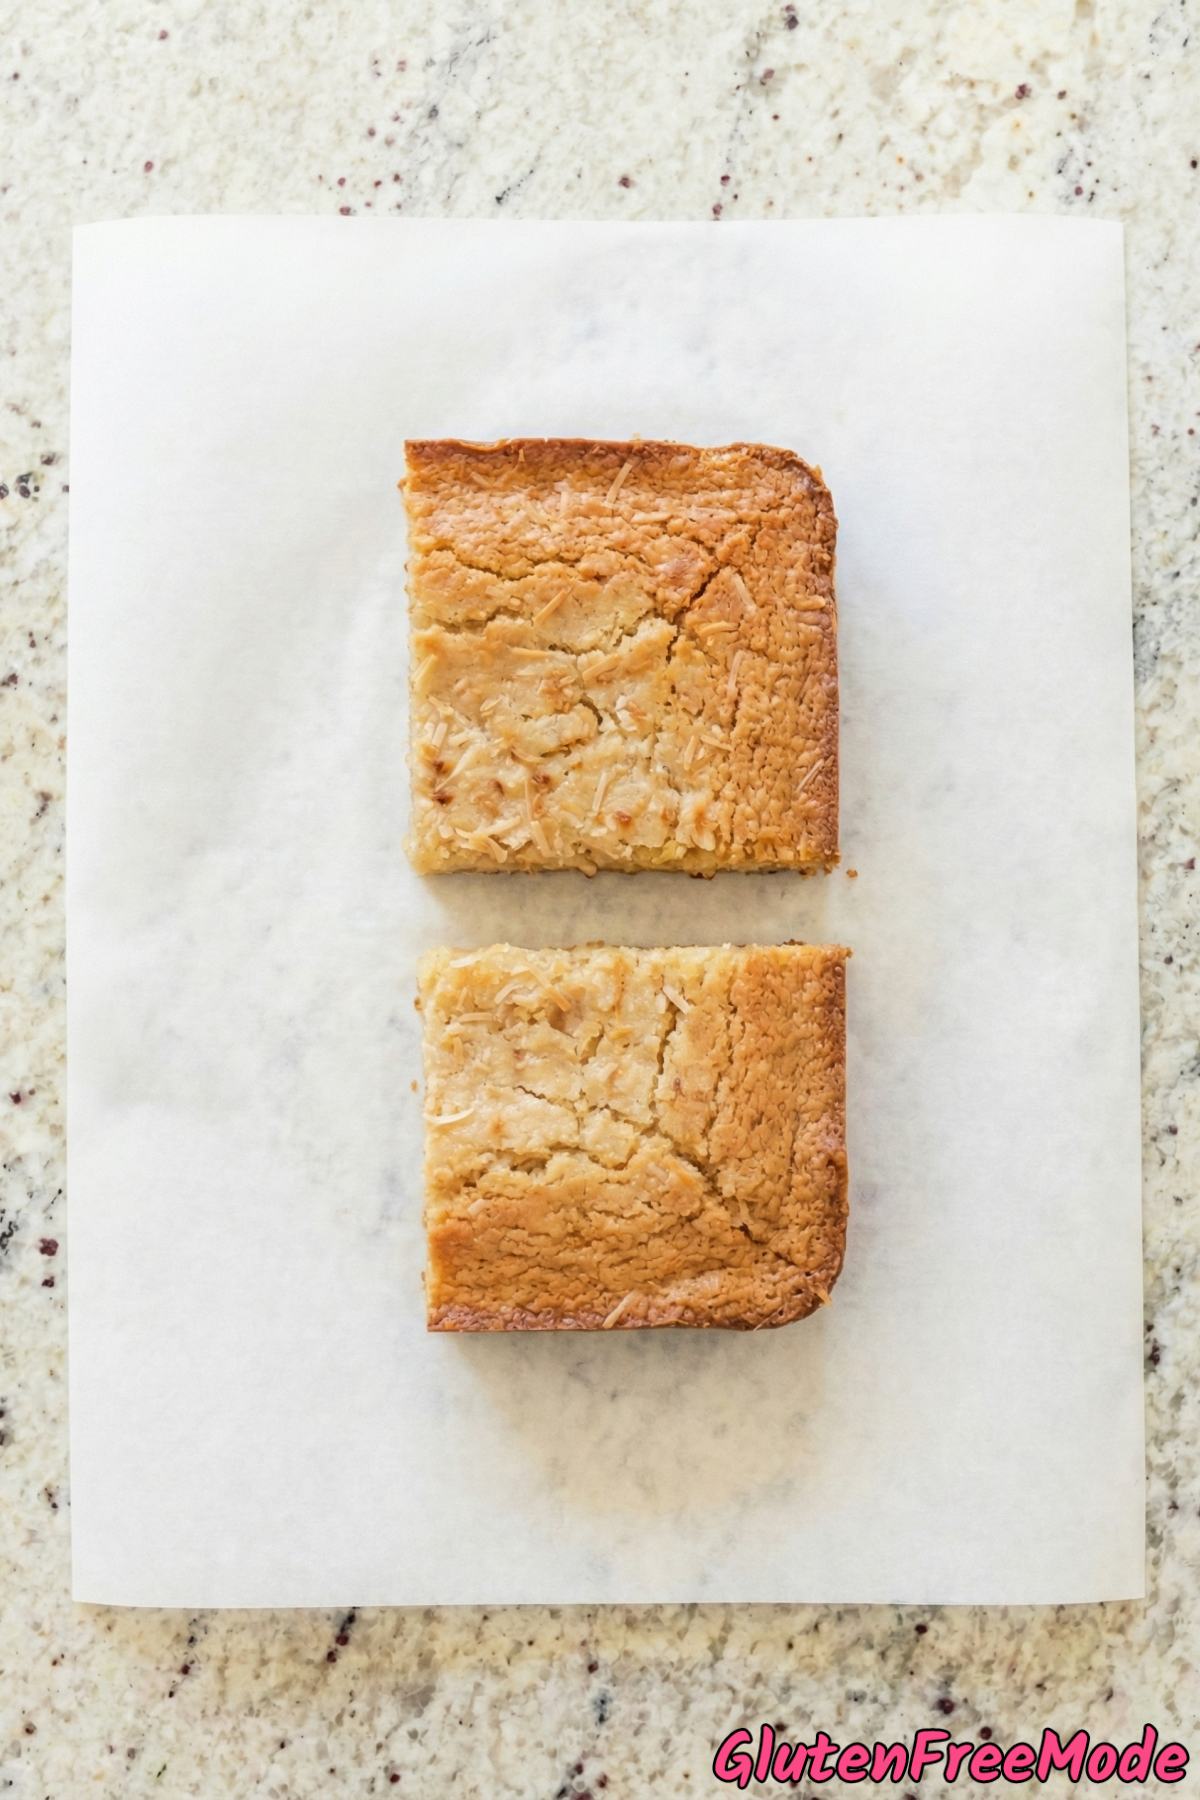
Bake for 50 to 60 minutes, until the top is golden brown and the edges pull slightly away from the sides of the pan. A toothpick inserted into the center should come out clean.
Step 7
Let the cake cool completely in the pan on a wire rack. Once cool, lift it out using the parchment overhang and slice into squares. The texture is best at room temperature, chewy and dense with crispy edges.

Helpful Tips
How to Brown Butter Without Burning It
Browning butter is what gives this mochi cake that rich, nutty flavor, but the line between browned and burnt is thin. Use a light-colored saucepan so you can actually see the butter changing color as it cooks. In a dark pan, you won’t notice the shift from golden to burnt until it’s too late.
Once the butter starts foaming, swirl the pan gently and keep your eyes on it. You’re looking for a golden amber color and little brown specks at the bottom of the pan. The whole thing should smell toasty and nutty, almost like caramel.
As soon as it hits that point, pull it off the heat right away. The hot pan will keep cooking the butter even after you remove it from the stove, so don’t wait for it to look “perfect” on the burner or it’ll go too far.
Use Mochiko Flour, Not Other Rice Flours
This recipe calls specifically for mochiko sweet rice flour, which is made from glutinous rice. Don’t swap it for regular rice flour or any other gluten free flour blend. They are completely different products and will not give you the same result.
Mochiko is what creates that signature chewy, dense, slightly sticky texture that makes butter mochi so good. Regular rice flour would give you something dry and crumbly instead.
You can find mochiko at most Asian grocery stores or online. The most common brand is Koda Farms in the blue and white box. Just make sure the package says “sweet rice flour” or “mochiko” and you’re good to go.
Shake Your Coconut Milk Can First
Full-fat coconut milk separates in the can, with a thick solid layer on top and watery liquid on the bottom. Before you open it, shake the can really well for about 30 seconds to combine everything together.
If you forget to shake and just scoop from the top, your batter will be too thick and fatty. If you pour from the bottom, it’ll be too thin and watery. Either way, your cake won’t have the right texture.
If the coconut cream is still clumpy after you open the can, just whisk it in a bowl until it’s smooth before adding it to the rest of the wet ingredients.
You Might Also Like
- Gluten Free Coconut Layer Cake
- Gluten Free Ooey Gooey Butter Cake
- Gluten Free Pistachio Pudding Cake
- Gluten Free Tres Leches Cake
- Gluten Free Madeleines
Frequently Asked Questions
Can I use regular rice flour instead of mochiko sweet rice flour?
No, regular rice flour and mochiko sweet rice flour are not the same thing and cannot be swapped. Mochiko is made from glutinous (sticky) rice, which is what gives this cake its signature chewy, dense, mochi-like texture.
If you use regular rice flour, the cake will turn out dry and crumbly instead of soft and chewy. Look for mochiko in the Asian foods aisle of most grocery stores or at any Asian market – the Koda Farms blue and white box is the most common brand.
Gluten Free Browned Butter Mochi Cake
Equipment
- 9x13-inch baking pan
- saucepan
Ingredients
- 1/2 cup Unsalted Butter
- 2 cups Mochiko Sweet Rice Flour
- 1 1/2 cups Granulated Sugar
- 1 tsp Baking Powder
- 1/2 tsp Fine Sea Salt
- 1 can Full-Fat Coconut Milk (13.5 oz)
- 3 Large Eggs
- 2 tsp Vanilla Extract
- 1 cup Sweetened Shredded Coconut
Instructions
- Preheat your oven to 350°F. Grease a 9x13-inch baking pan and line it with parchment paper, leaving an overhang on two sides for easy removal.
- In a small saucepan, melt the butter over medium heat, swirling the pan occasionally. Continue cooking until the butter turns golden amber and smells nutty, about 5 minutes. Watch carefully to avoid burning. Remove from heat and let cool slightly.
- In a large bowl, whisk together the mochiko sweet rice flour, granulated sugar, baking powder, and salt until evenly combined.
- In a separate bowl, whisk together the coconut milk, eggs, browned butter, and vanilla extract until smooth. Pour the wet mixture into the dry ingredients and stir until a smooth, pourable batter forms with no lumps.
- Fold in the sweetened shredded coconut until evenly distributed throughout the batter. Pour into the prepared pan and spread into an even layer.
- Bake for 50 to 60 minutes, until the top is golden brown and the edges pull slightly away from the sides of the pan. A toothpick inserted into the center should come out clean.
- Let the cake cool completely in the pan on a wire rack. Once cool, lift it out using the parchment overhang and slice into squares. The texture is best at room temperature, chewy and dense with crispy edges.