If you’ve never had a crepe cake before, you’re in for a treat. It’s basically layers and layers of thin crepes stacked with a creamy filling in between, and it tastes as good as it looks.
This version is completely gluten free and loaded with chocolate hazelnut flavor. Think Nutella in almost every layer, from the filling all the way to the topping.
Making the crepes is the most hands-on part, but it’s not hard. You just need a good non-stick pan and a little patience. Once they’re done, the rest comes together quickly.
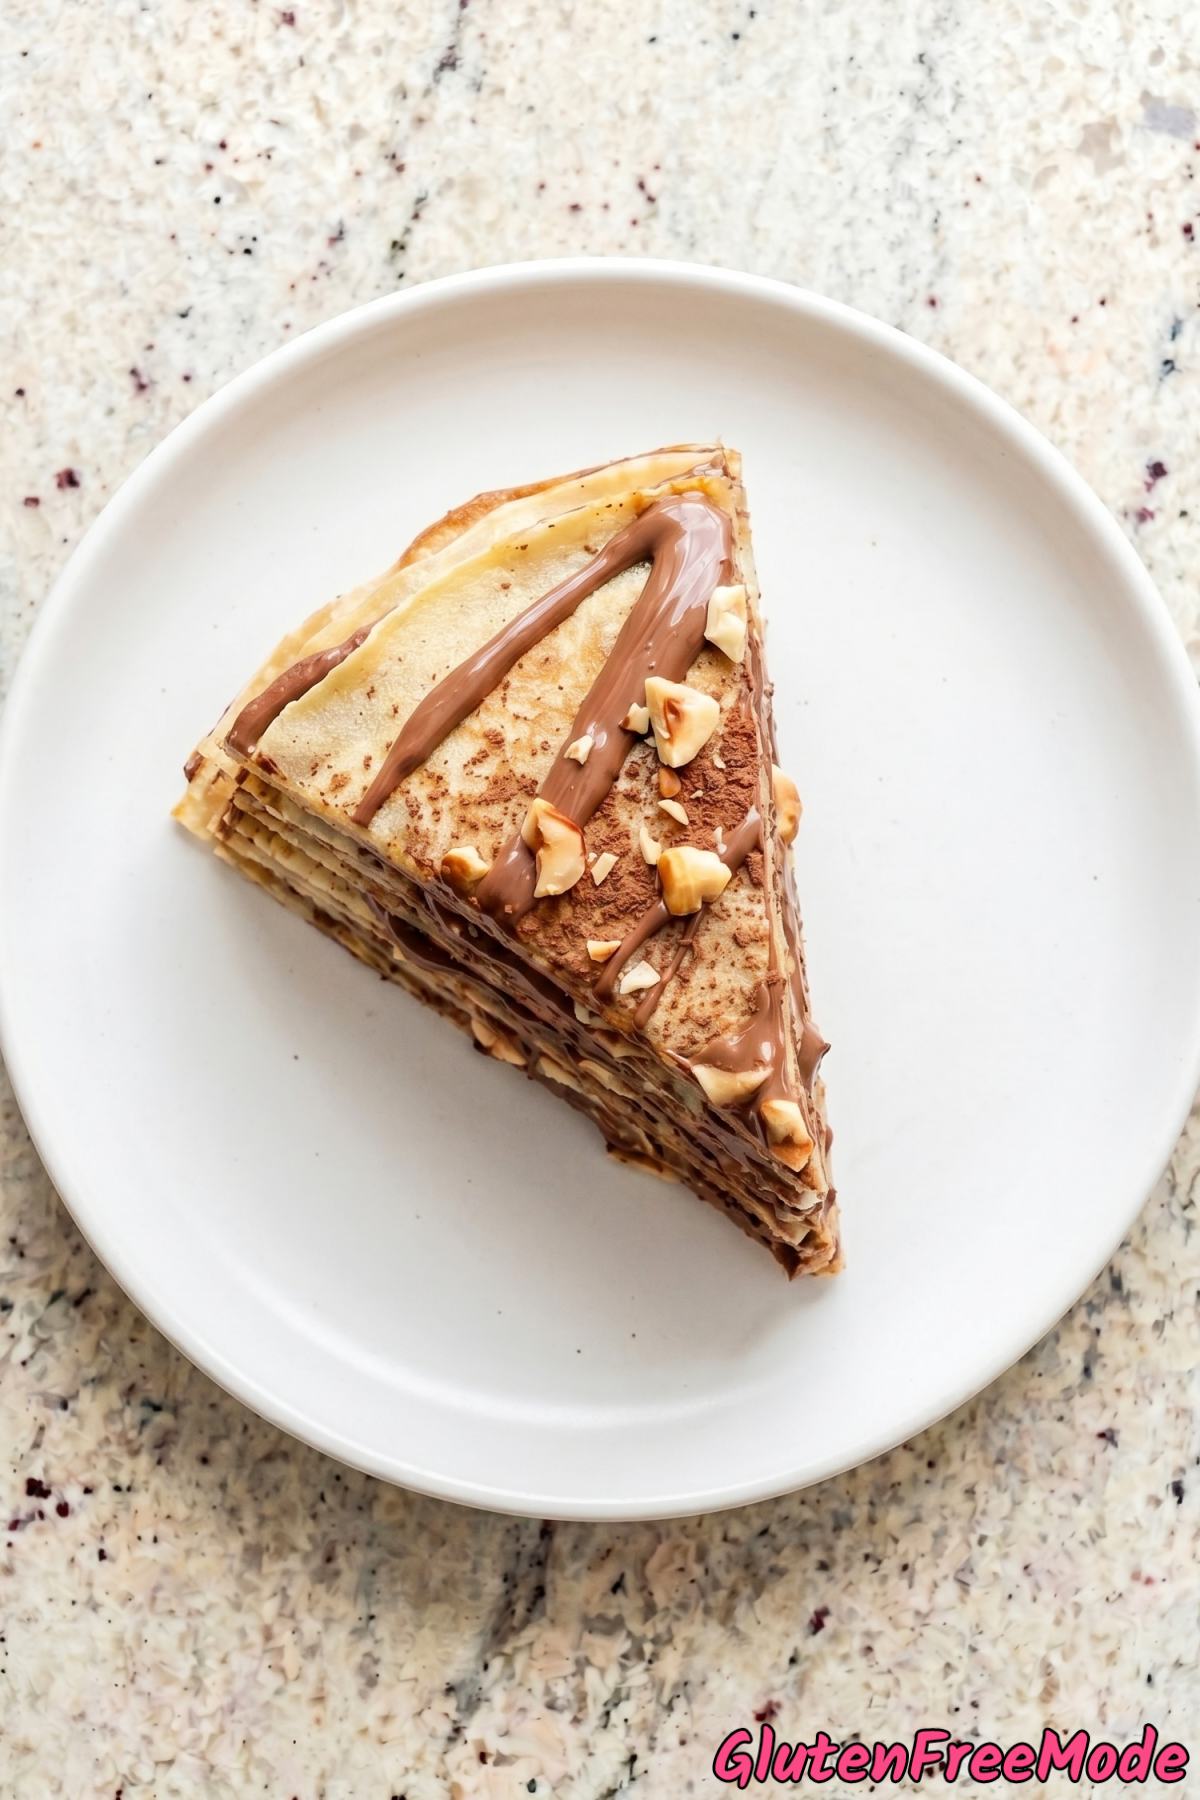
The filling is smooth, creamy, and not overly sweet. It firms up in the fridge so you can slice the cake cleanly and see all those gorgeous layers.
This is the kind of dessert that makes people go quiet for a second after the first bite. And nobody will guess it’s gluten free unless you tell them.
Why You’ll Love This Recipe
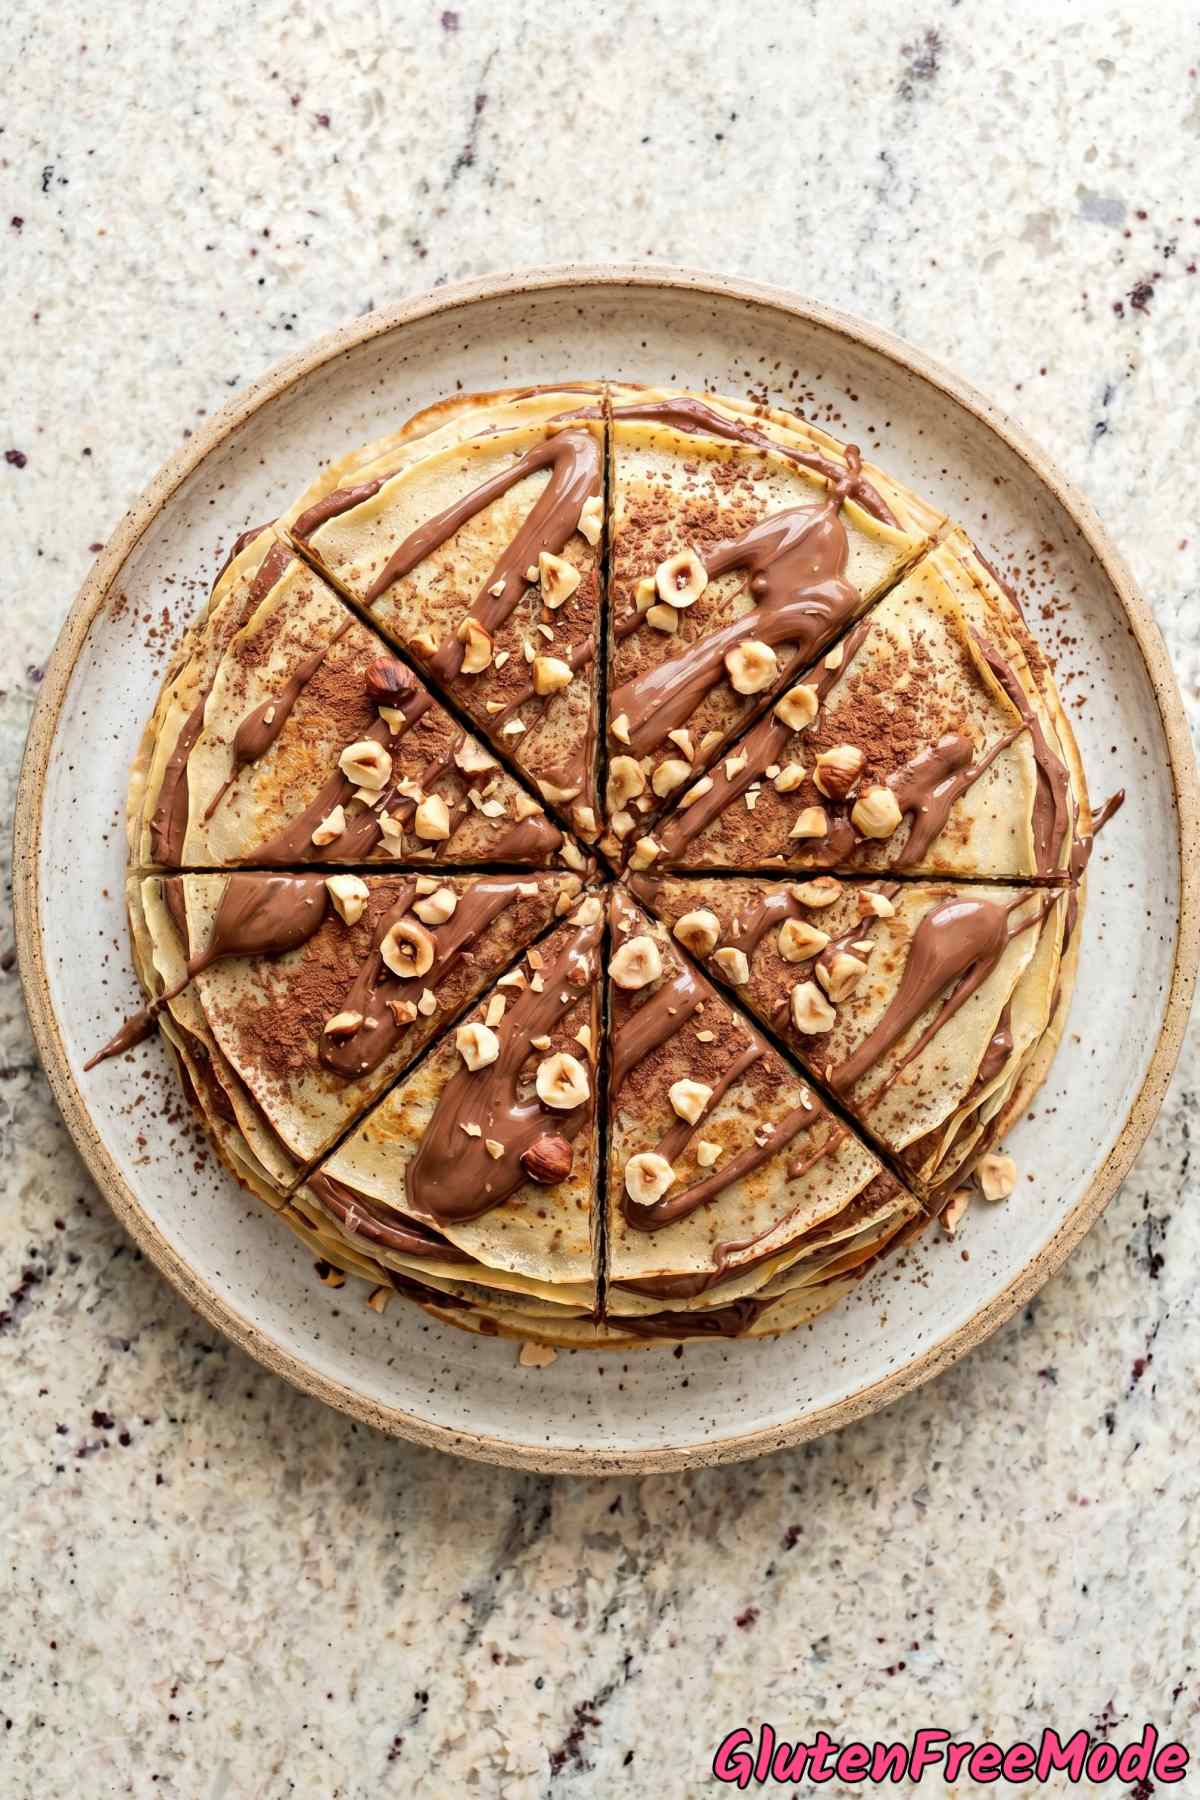
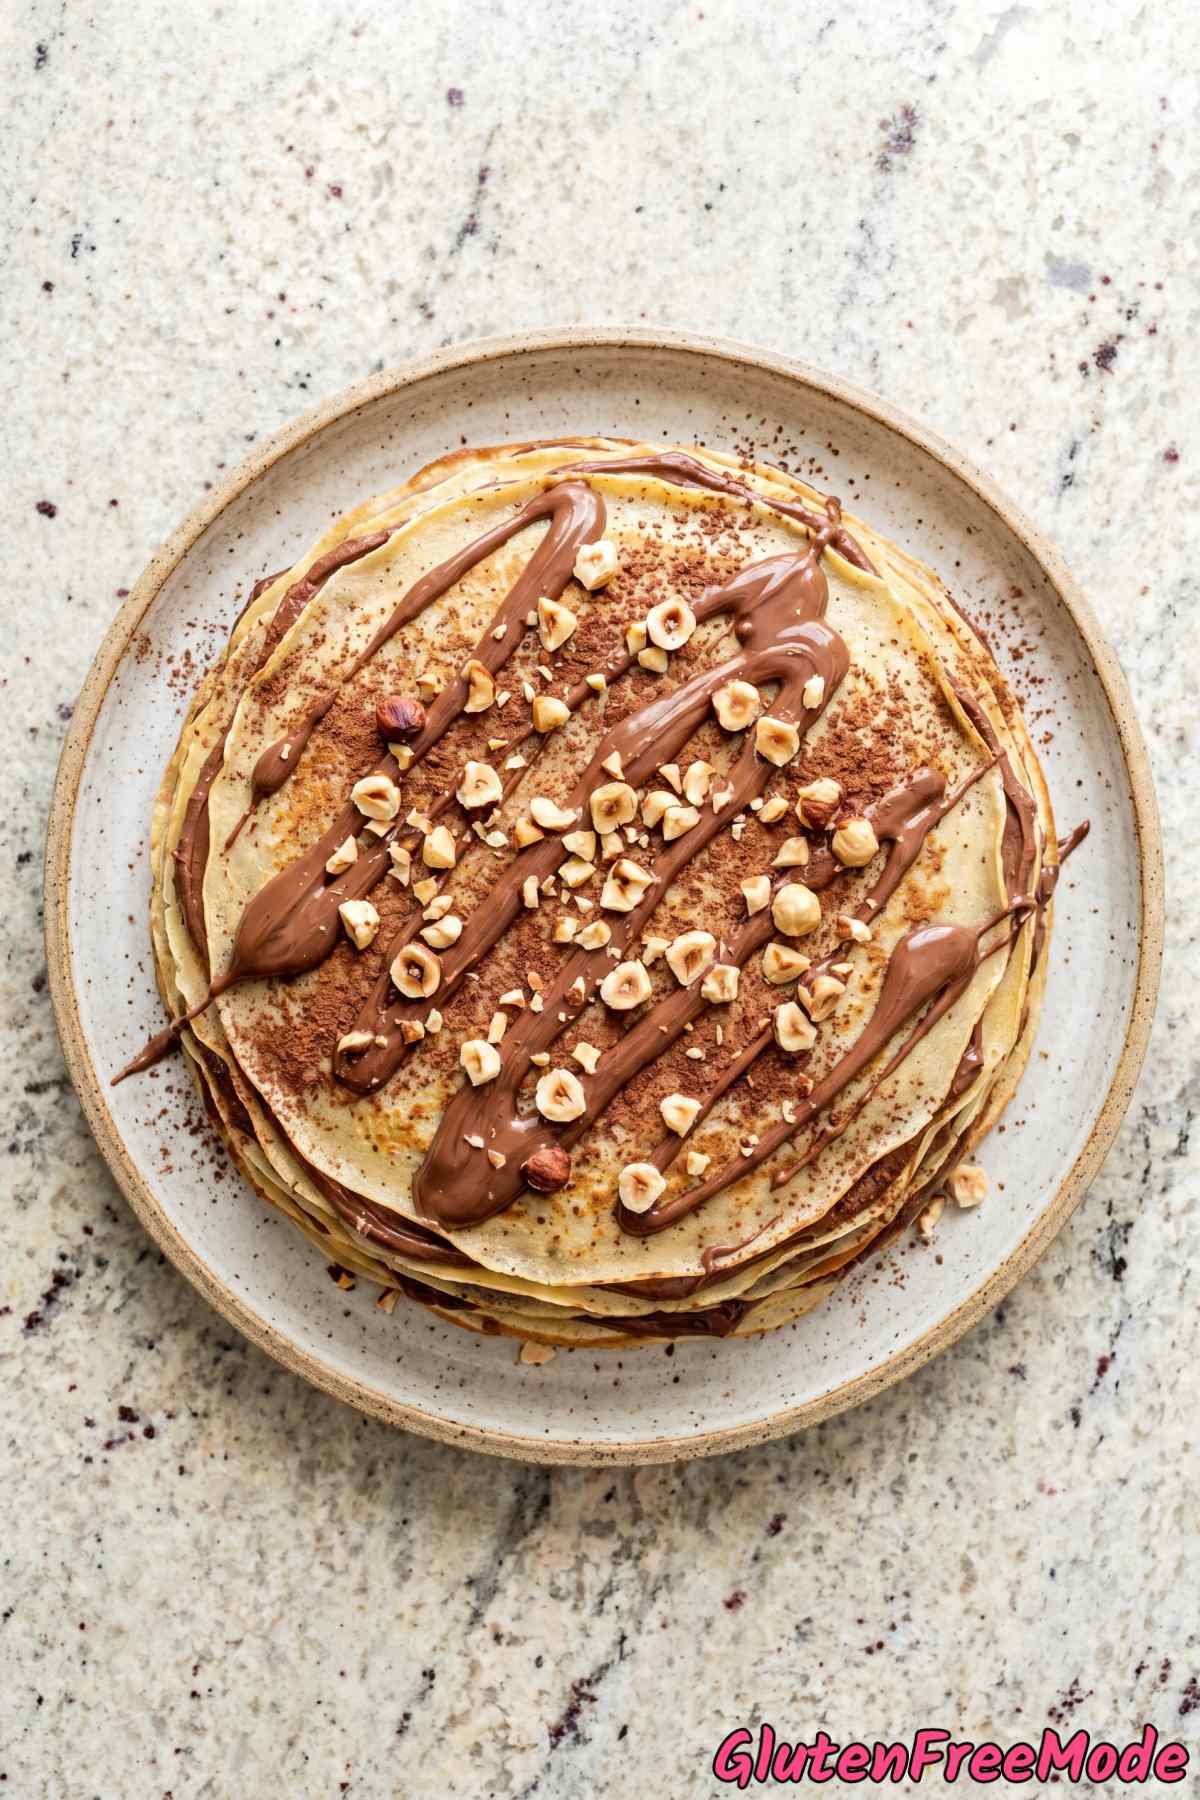
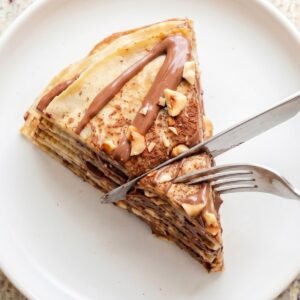
It Looks Absolutely Stunning – Those dozens of thin layers create a showstopper dessert that looks like it came from a fancy French bakery.
The Filling Is Insanely Creamy – Mascarpone and whipped cream folded into Nutella makes a mousse-like filling that melts on your tongue.
You Would Never Know It Is Gluten Free – The overnight rest and chilling make the crepes so soft that nobody can tell they are made with gluten free flour.
Ingredients
For the Crepes
- 1 cup Gluten Free 1-to-1 Baking Flour
- 3 Large Eggs
- 1 1/4 cups Whole Milk
- 2 tbsp Melted Unsalted Butter
- 2 tbsp Granulated Sugar
- 1/4 tsp Salt
- Butter for greasing pan
For the Filling
- 2 cups Heavy Cream
- 1 cup Nutella
- 8 oz Mascarpone Cheese, softened
- 2 tbsp Powdered Sugar
For the Topping
- 1/2 cup Nutella, warmed
- 1/4 cup Chopped Toasted Hazelnuts
- Cocoa Powder for dusting
How to Make
Step 1
In a blender, combine the gluten free flour, eggs, milk, melted butter, sugar, and salt. Blend until completely smooth, about 30 seconds. Transfer the batter to a bowl, cover, and refrigerate for at least 1 hour or overnight. This rest allows the starch to hydrate for tender crepes.
Step 2
Heat an 8 or 9-inch non-stick skillet over medium heat and lightly grease with butter. Pour about 3 tablespoons of batter into the pan, immediately swirling to coat the bottom in a thin, even layer. Cook for about 1 minute until the edges lift easily and the bottom is lightly golden.
Flip and cook for another 20 to 30 seconds. Transfer to a plate. Repeat with remaining batter, stacking crepes between layers. You should get about 18 to 22 crepes. Let them cool completely.
Step 3
Make the filling by whipping the heavy cream to stiff peaks in a large bowl. In a separate bowl, stir together the nutella and mascarpone until smooth, then add the powdered sugar and mix well.
Gently fold the whipped cream into the nutella mascarpone mixture in two additions until evenly combined and no streaks remain. Be careful not to deflate the cream.
Step 4
Place one crepe on a serving plate or cake stand. Spread about 2 to 3 tablespoons of the filling evenly over the crepe, going almost to the edges. Top with another crepe and repeat the layering until all crepes are stacked.
Step 5
Gently press down on the top of the cake with your hands to settle the layers. Cover and refrigerate for at least 4 hours or overnight. This chilling time is essential as it allows the filling to firm up and the crepes to soften and meld together.
Step 6
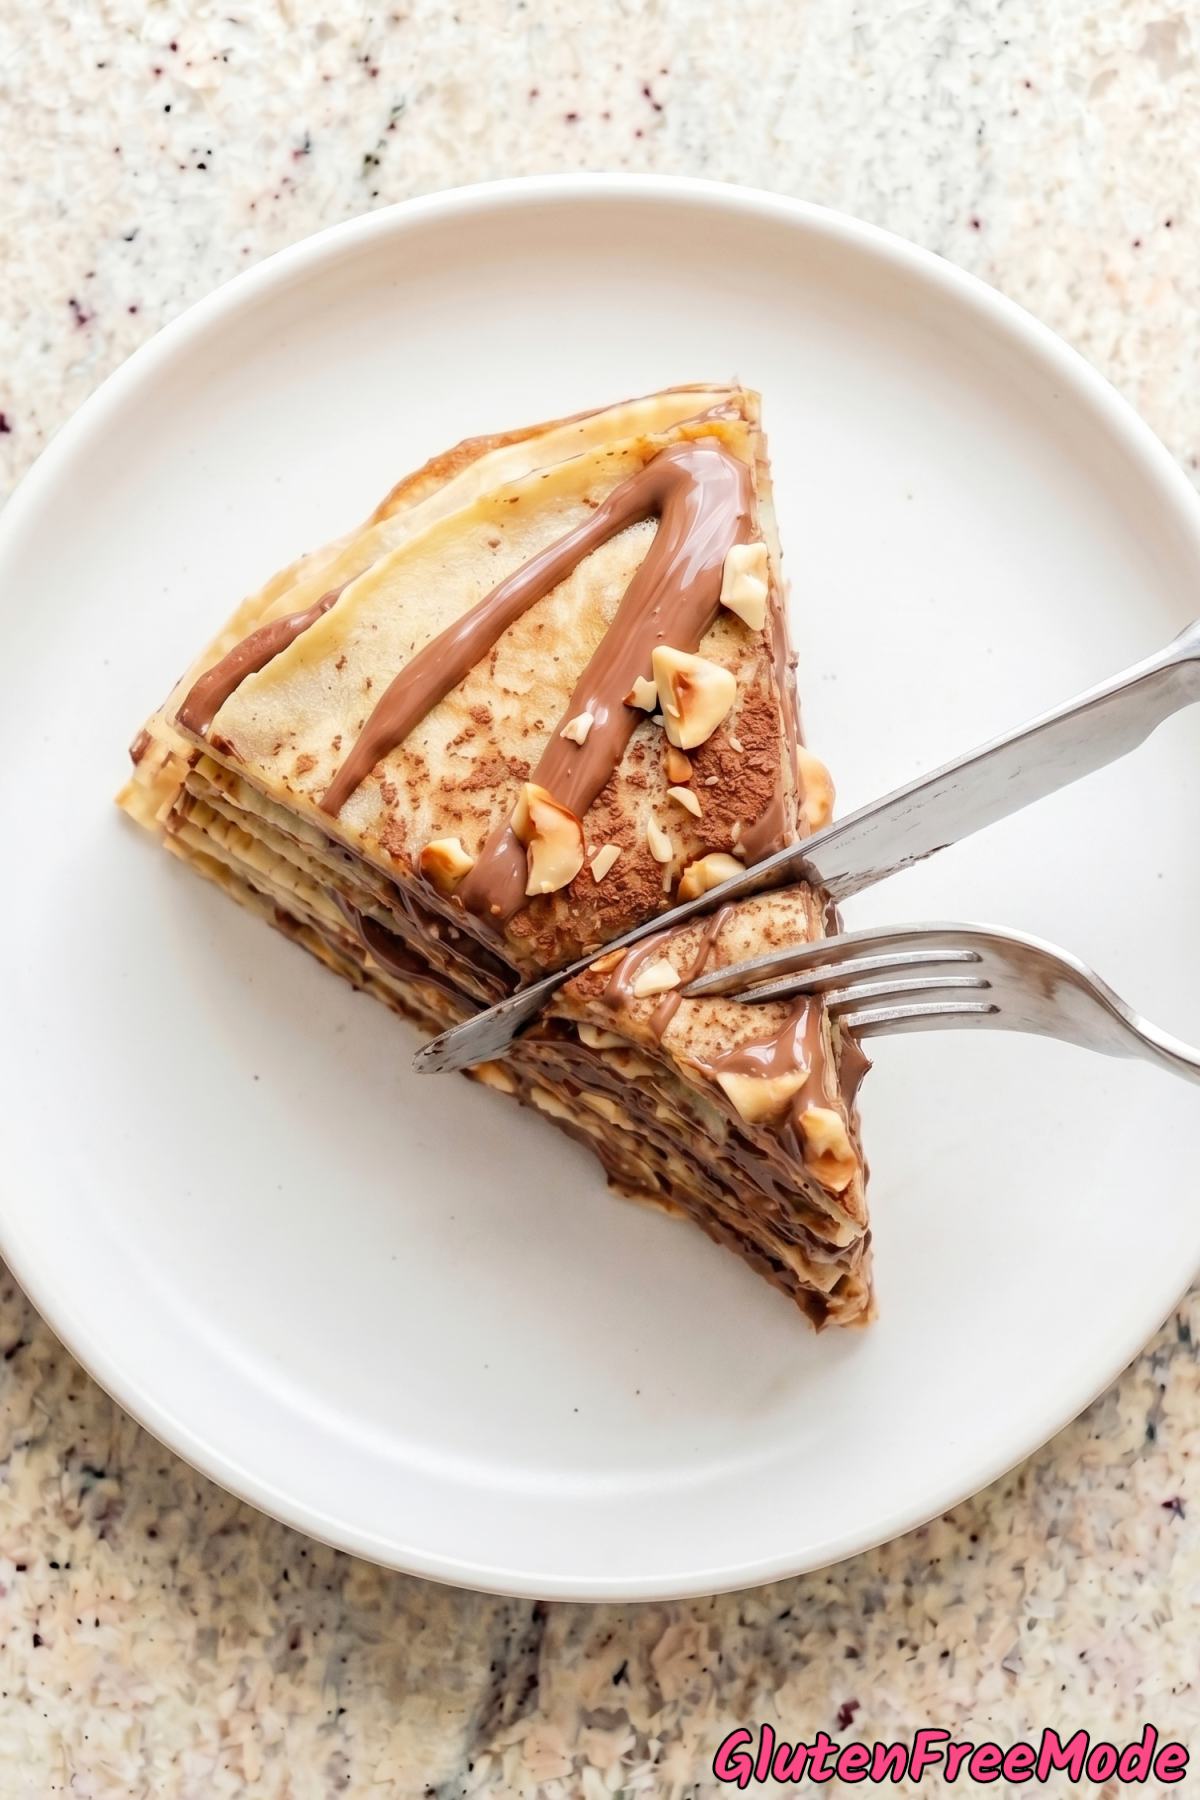
When ready to serve, warm the 1/2 cup of nutella in the microwave for about 20 seconds until pourable. Drizzle it over the top of the crepe cake, letting some cascade down the sides. Sprinkle with chopped toasted hazelnuts and a light dusting of cocoa powder. Slice with a sharp motion for the cleanest layers.
My Tips
Rest the Batter the Full Hour
Gluten free flour absorbs liquid slower than regular flour. If you skip the resting step or cut it short, your crepes will be gritty and tear apart when you try to flip them.
One hour is the minimum, but overnight in the fridge is even better. The batter should look smooth and have the consistency of heavy cream when you’re ready to cook. If it thickened up too much in the fridge, stir in a splash of milk to thin it out.
Get the Pan Temperature Right
Medium heat is key here. If your pan is too hot, the batter will set the second it hits the surface and you won’t be able to swirl it into a thin even layer. Too low and the crepes will be pale and rubbery.
A good test is to flick a tiny drop of water onto the pan. It should sizzle gently, not pop and evaporate instantly. The first crepe is almost always a throwaway while you dial in the heat, so don’t worry about it.
Also, re-grease the pan with just a thin swipe of butter every 3-4 crepes. Too much butter will make them greasy and they won’t stack well.
Cool the Crepes Completely Before Stacking the Cake
If you spread the filling on warm crepes, the whipped cream in the filling will melt and turn into a runny mess. The layers will slide around and the whole cake will be lopsided.
Spread them out on a cooling rack or layer them between sheets of parchment paper on the counter. They only take about 15-20 minutes to cool fully. You can even make the crepes the day before and keep them covered in the fridge.
More Tasty Recipes
- Gluten Free Authentic French Crepes
- Gluten Free Chocolate Hazelnut Tart
- Gluten Free Nutella Stuffed Cookies
- Gluten Free Chocolate Truffle Torte
- Gluten Free Nutella Crumble Swirl Bread
FAQ
Can I make the crepes ahead of time?
Yes, and it actually makes the whole process way easier. You can make the crepes a day or two in advance, stack them between sheets of parchment or wax paper, and store them in an airtight container or zip-top bag in the fridge.
You can even freeze them for up to a month. Just thaw them in the fridge overnight before assembling the cake. Making the crepes ahead lets you spread the work over two days so it doesn’t feel overwhelming.
Gluten Free Chocolate Hazelnut Crepe Cake
Equipment
- blender
- non-stick skillet
- cake stand
Ingredients
For the Crepes
- 1 cup Gluten Free 1-to-1 Baking Flour
- 3 Large Eggs
- 1 1/4 cups Whole Milk
- 2 tbsp Melted Unsalted Butter
- 2 tbsp Granulated Sugar
- 1/4 tsp Salt
- Butter for greasing pan
For the Filling
- 2 cups Heavy Cream
- 1 cup Nutella
- 8 oz Mascarpone Cheese, softened
- 2 tbsp Powdered Sugar
For the Topping
- 1/2 cup Nutella, warmed
- 1/4 cup Chopped Toasted Hazelnuts
- Cocoa Powder for dusting
Instructions
- In a blender, combine the gluten free flour, eggs, milk, melted butter, sugar, and salt. Blend until completely smooth, about 30 seconds. Transfer the batter to a bowl, cover, and refrigerate for at least 1 hour or overnight. This rest allows the starch to hydrate for tender crepes.
- Heat an 8 or 9-inch non-stick skillet over medium heat and lightly grease with butter. Pour about 3 tablespoons of batter into the pan, immediately swirling to coat the bottom in a thin, even layer. Cook for about 1 minute until the edges lift easily and the bottom is lightly golden. Flip and cook for another 20 to 30 seconds. Transfer to a plate. Repeat with remaining batter, stacking crepes between layers. You should get about 18 to 22 crepes. Let them cool completely.
- Make the filling by whipping the heavy cream to stiff peaks in a large bowl. In a separate bowl, stir together the nutella and mascarpone until smooth, then add the powdered sugar and mix well. Gently fold the whipped cream into the nutella mascarpone mixture in two additions until evenly combined and no streaks remain. Be careful not to deflate the cream.
- Place one crepe on a serving plate or cake stand. Spread about 2 to 3 tablespoons of the filling evenly over the crepe, going almost to the edges. Top with another crepe and repeat the layering until all crepes are stacked.
- Gently press down on the top of the cake with your hands to settle the layers. Cover and refrigerate for at least 4 hours or overnight. This chilling time is essential as it allows the filling to firm up and the crepes to soften and meld together.
- When ready to serve, warm the 1/2 cup of nutella in the microwave for about 20 seconds until pourable. Drizzle it over the top of the crepe cake, letting some cascade down the sides. Sprinkle with chopped toasted hazelnuts and a light dusting of cocoa powder. Slice with a sharp motion for the cleanest layers.