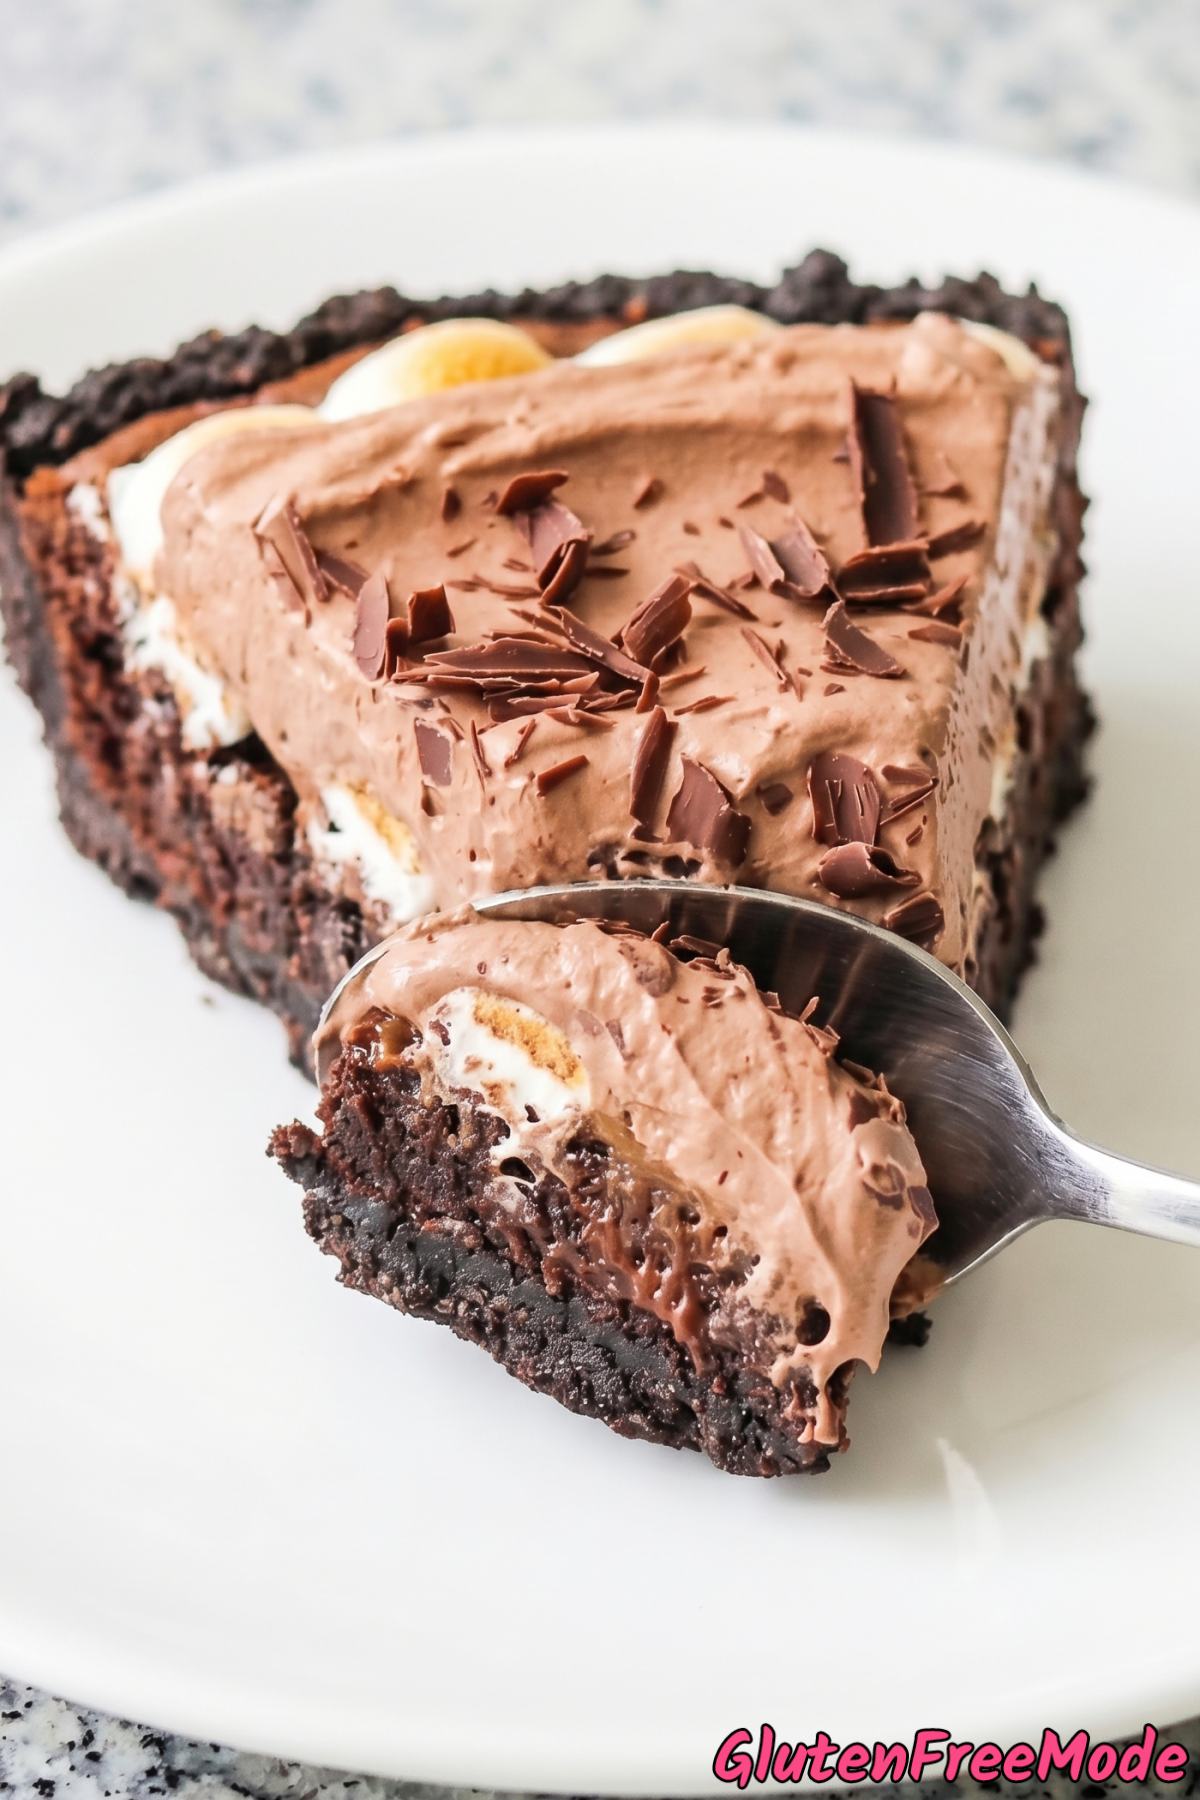
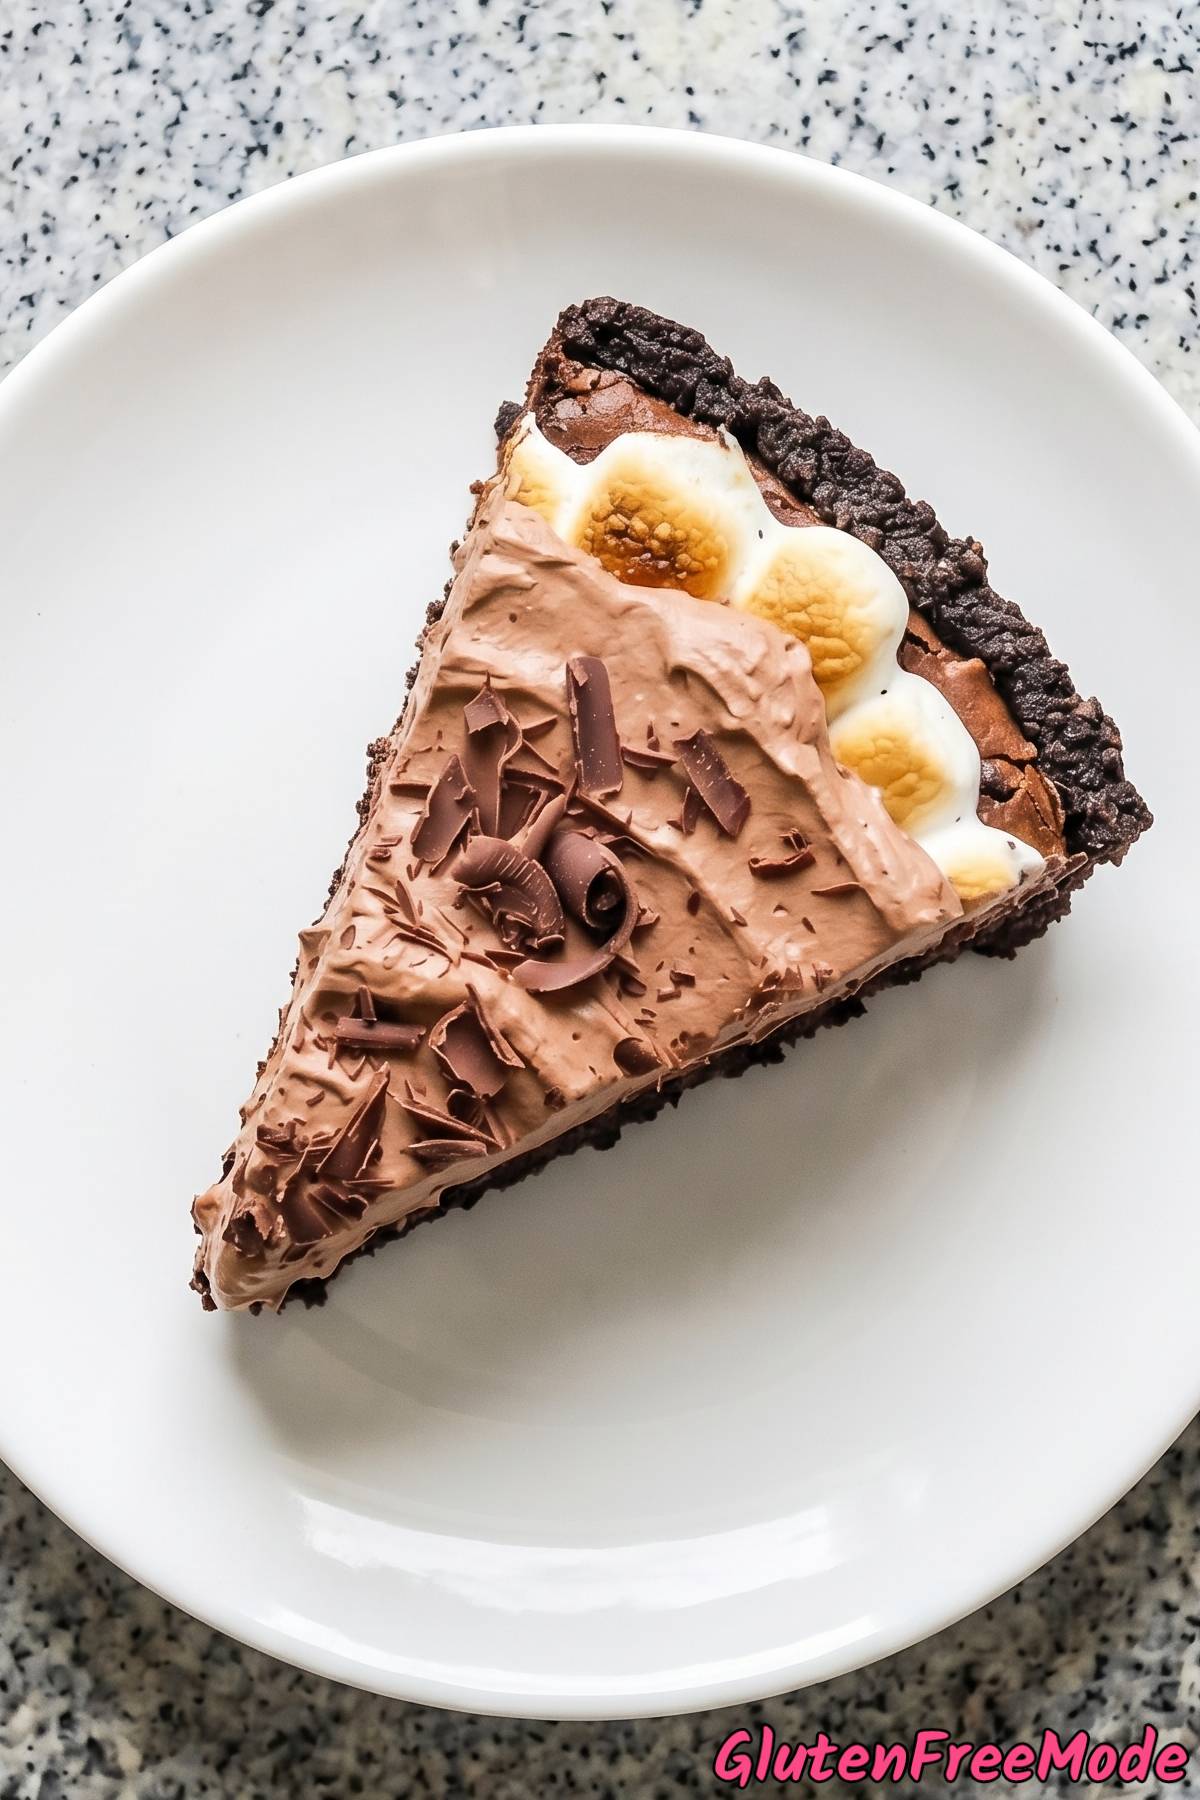
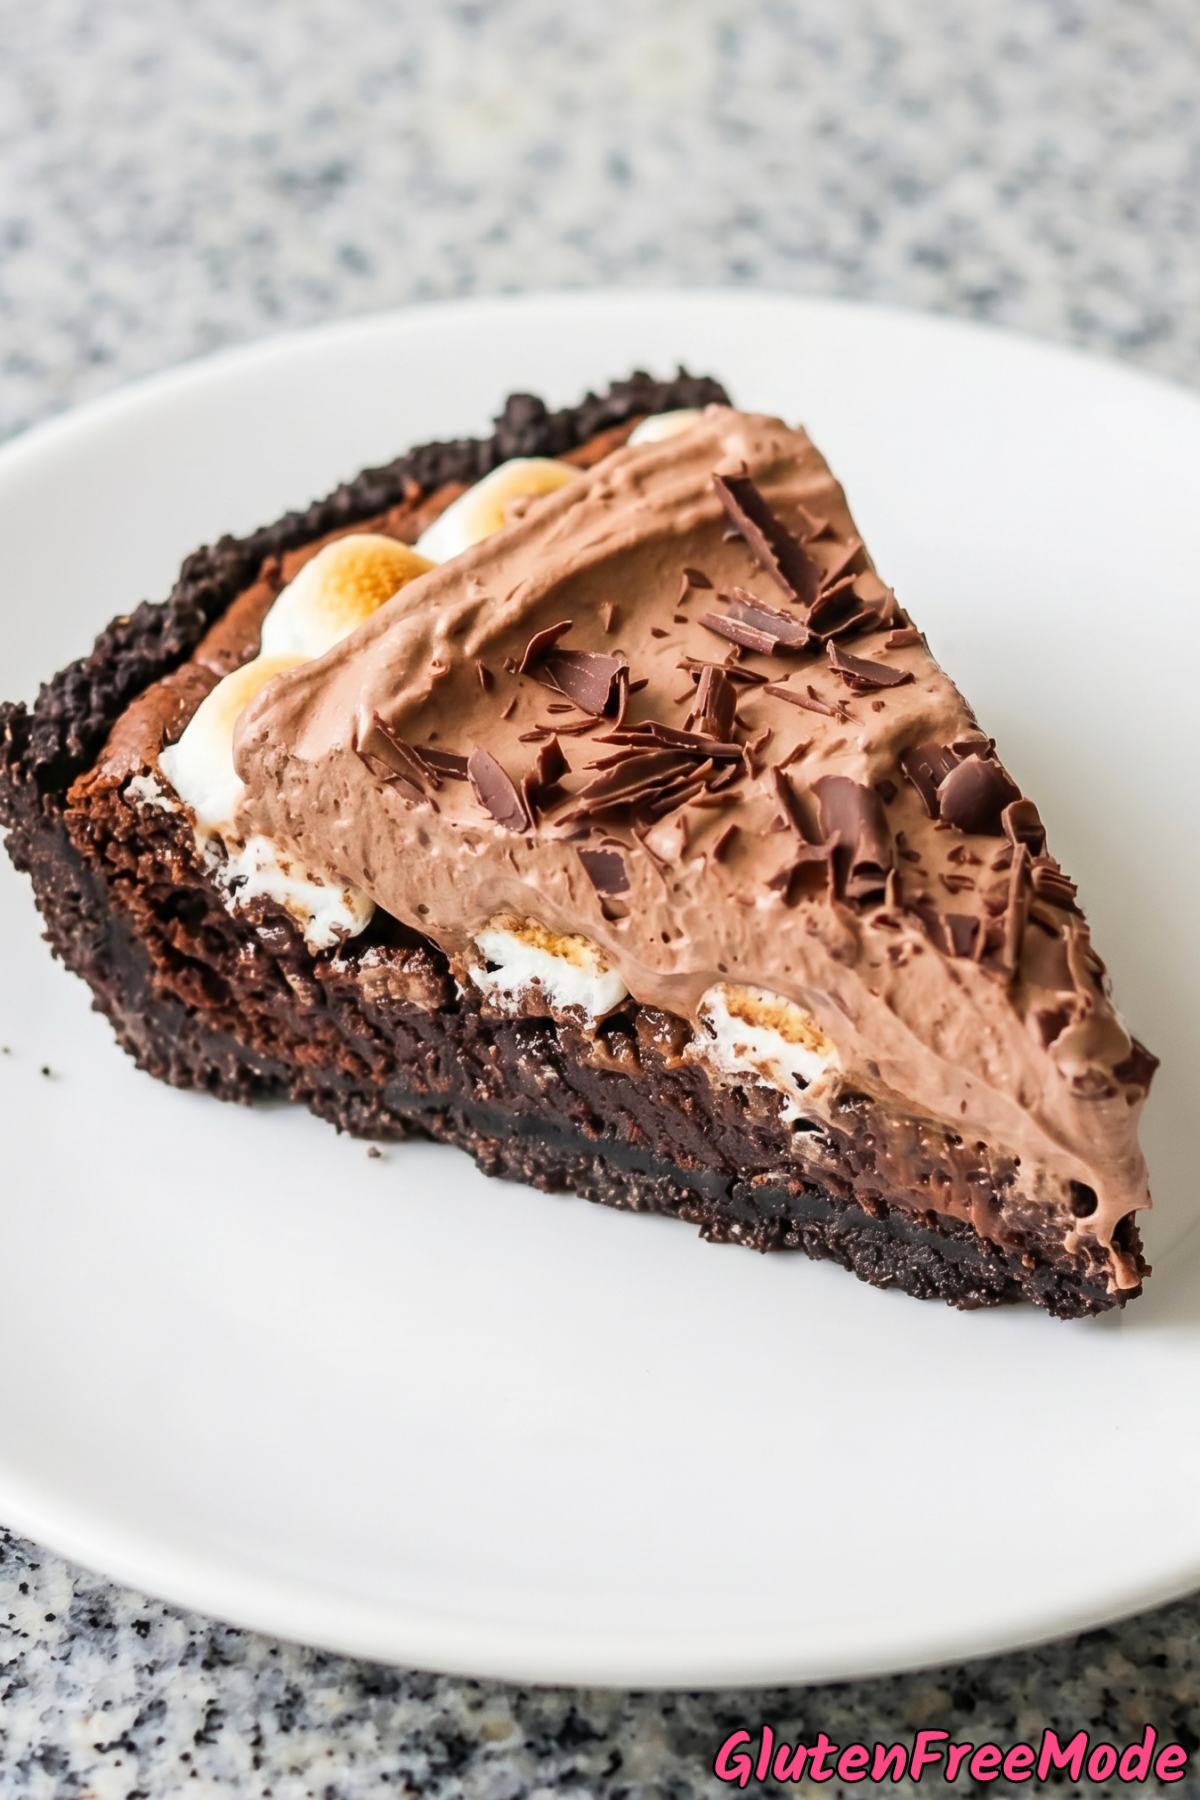
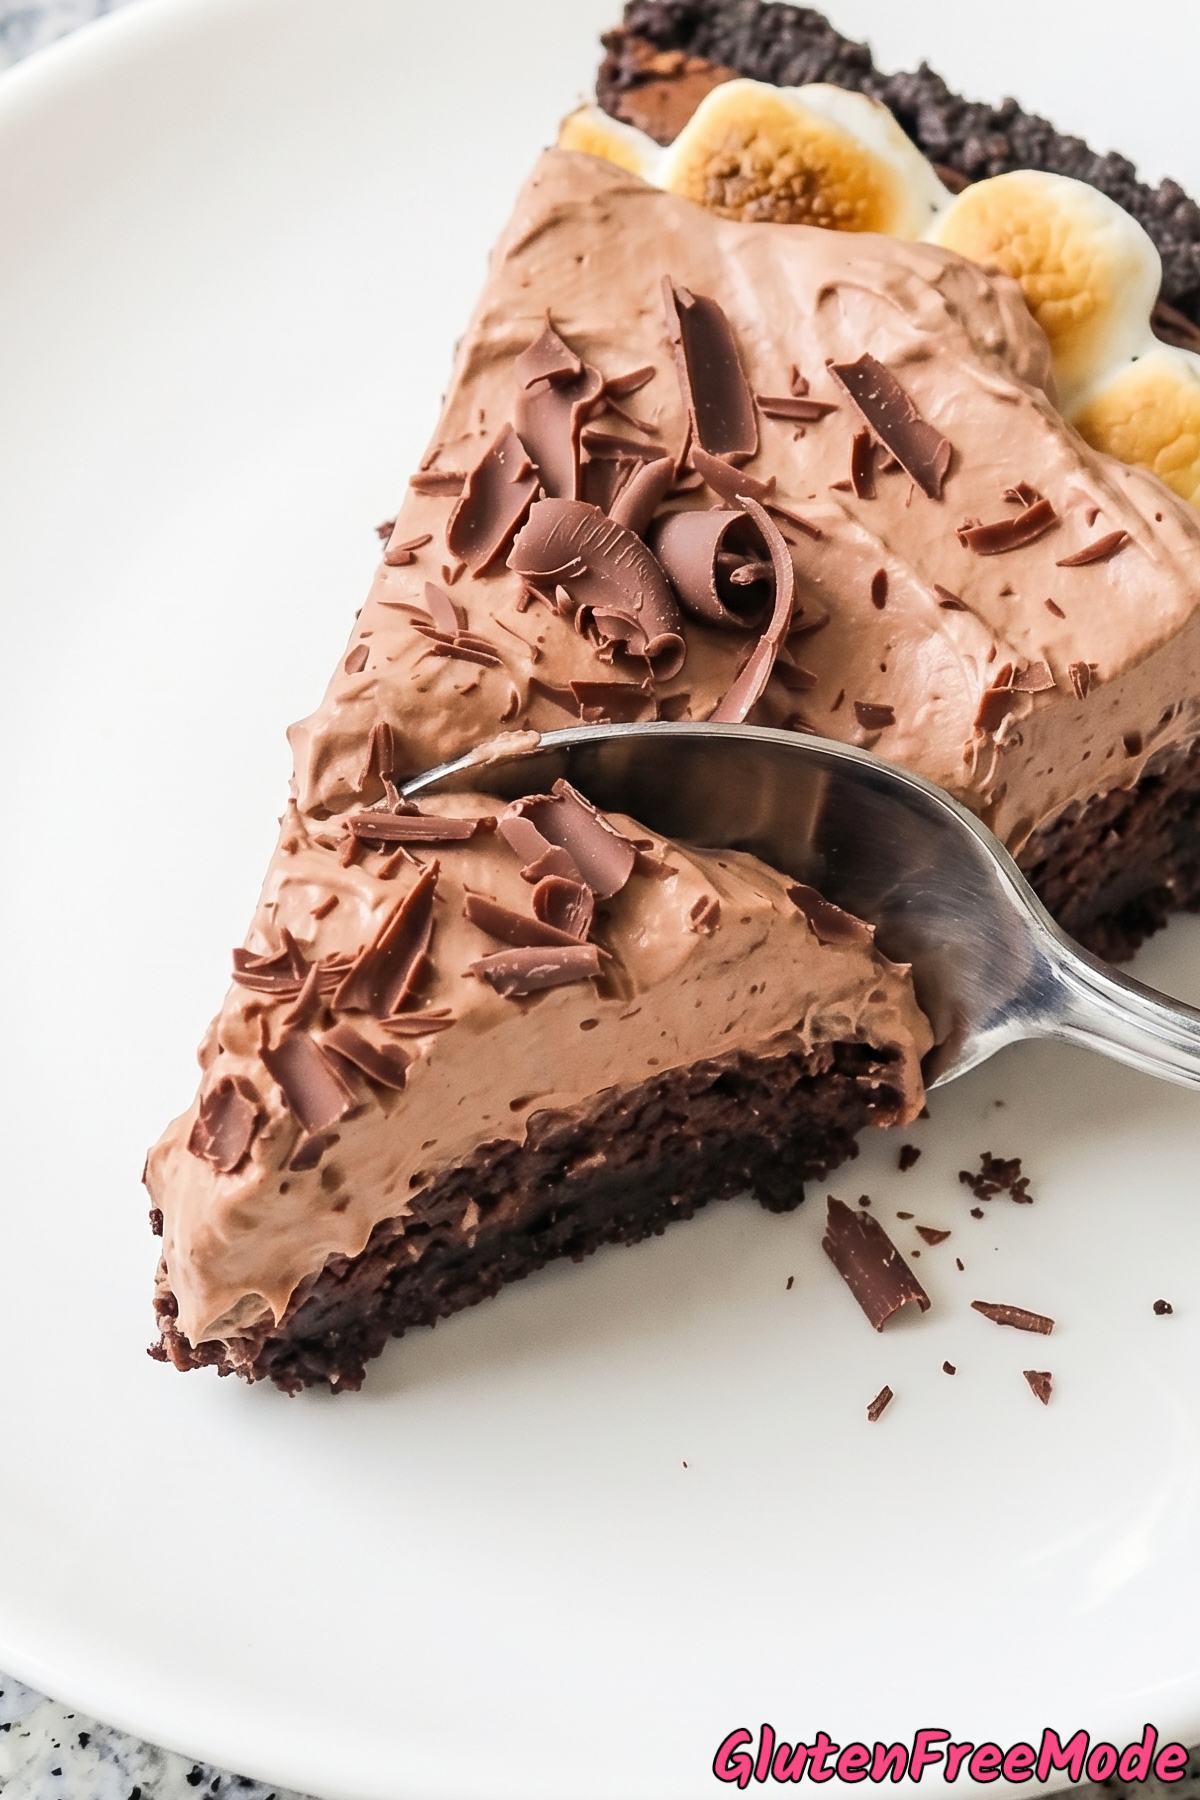
If you’ve been looking for a showstopper gluten free dessert, this Mississippi mud pie is it. Rich brownie layer, gooey marshmallows, and chocolate whipped cream on top. It’s as good as it sounds.
The best part is that nobody will guess it’s gluten free. Every layer is packed with chocolate flavor, and the texture is spot on.
It does take a few steps to put together, but none of them are hard. You bake the crust, make a simple brownie filling, add marshmallows, and finish with whipped cream.
You’ll want to let it chill in the fridge before serving. That’s when everything sets up and the layers really come together.
This is the kind of pie that works for holidays, birthdays, or just a regular weekend when you want something special. Let me walk you through how to make it.
Why You’ll Love This Recipe
It’s Totally Gluten Free – If you miss indulgent chocolate desserts because of a gluten free diet, this Mississippi Mud Pie lets you enjoy every rich, fudgy bite without worrying about gluten.

Three Layers of Chocolate Heaven – You get a chocolate cookie crust, a fudgy brownie middle, and chocolate whipped cream on top, so every single layer is packed with deep chocolate flavor.
That Gooey Marshmallow Layer is Everything – The mini marshmallows puff up and get lightly golden on top of the warm brownie layer, creating a soft gooey texture that makes this pie seriously addictive.
Ingredients
For the Crust
- 2 cups Gluten Free Chocolate Sandwich Cookie Crumbs (about 24 cookies)
- 5 tbsp Unsalted Butter, melted
For the Brownie Layer
- 1/2 cup Unsalted Butter
- 4 oz Unsweetened Chocolate, chopped
- 1 cup Granulated Sugar
- 2 Large Eggs
- 1 tsp Vanilla Extract
- 1/2 cup Gluten Free 1-to-1 Baking Flour
- 1/4 tsp Salt
For the Topping
- 2 cups Mini Marshmallows
- 1 1/2 cups Heavy Whipping Cream
- 3 tbsp Powdered Sugar
- 2 tbsp Unsweetened Cocoa Powder
- Chocolate Shavings, for garnish
How to Make
Step 1
Preheat your oven to 350°F. In a bowl, stir together the gluten free chocolate cookie crumbs and melted butter until evenly moistened. Press the mixture firmly into the bottom and up the sides of a 9-inch pie dish. Bake for 8 minutes, then remove and set aside.
Step 2
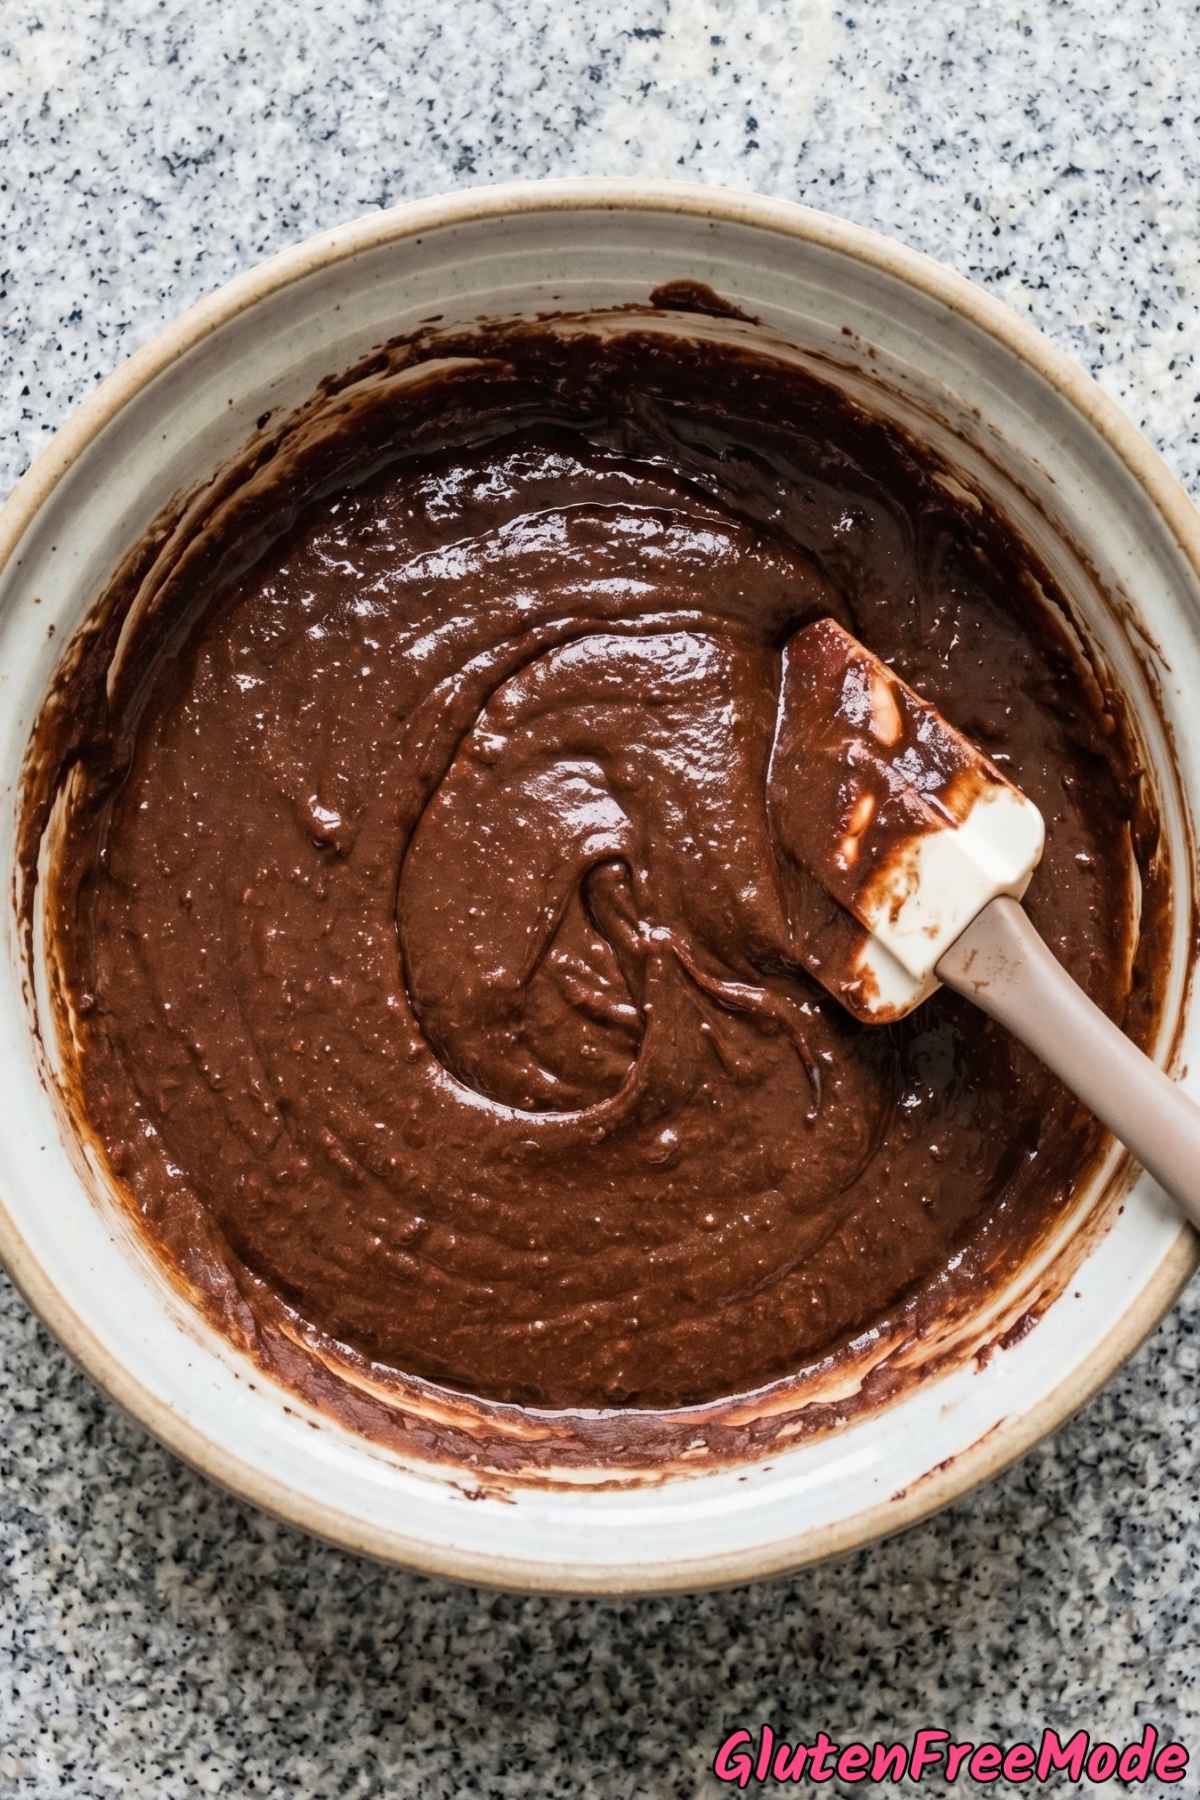
For the brownie layer, melt the butter and chopped unsweetened chocolate together in a saucepan over low heat, stirring constantly until smooth. Remove from heat and let cool for 5 minutes.
Step 3
Whisk the granulated sugar, eggs, and vanilla extract into the chocolate mixture until smooth. Fold in the gluten free 1-to-1 baking flour and salt until just combined.
Step 4
Pour the brownie batter into the pre-baked crust and bake for 25-28 minutes, until the brownie layer is set but still slightly fudgy in the center.
Step 5
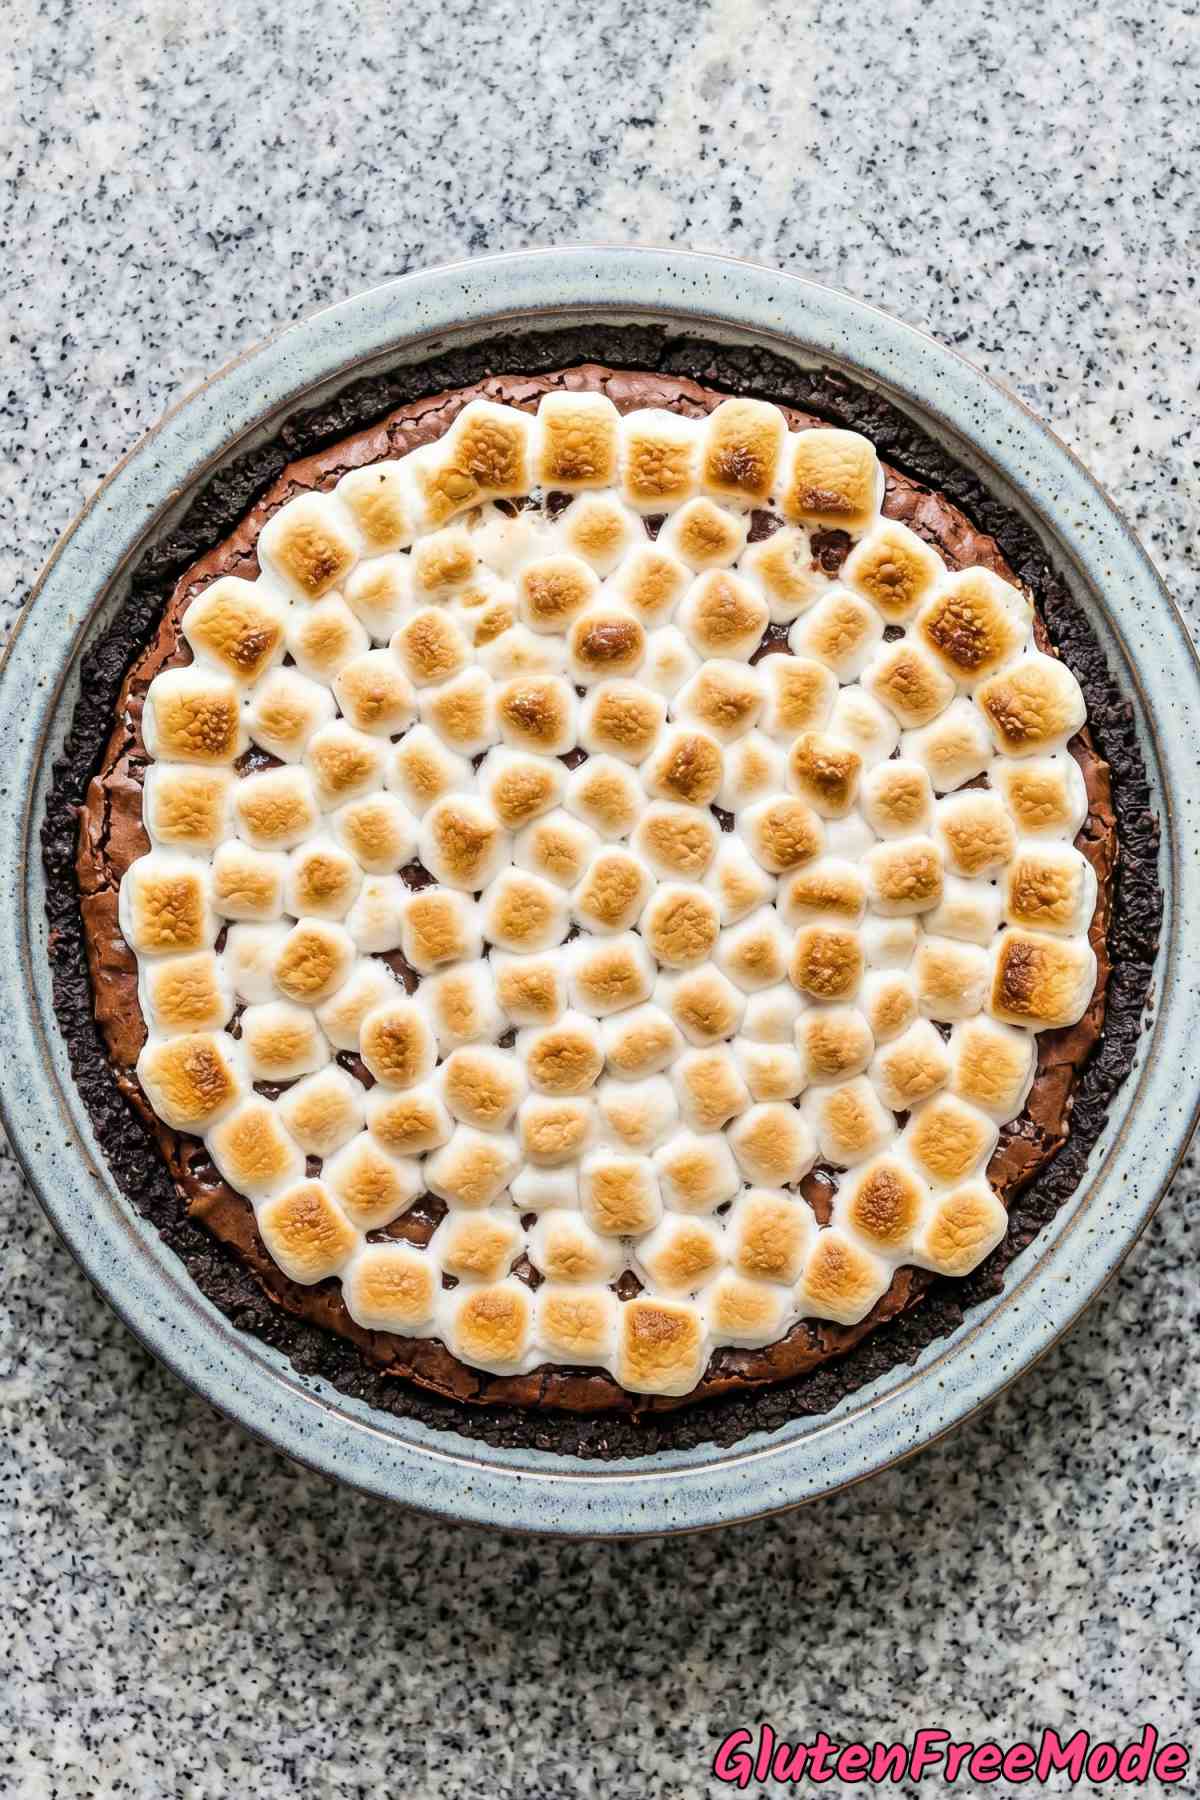
Remove the pie from the oven and immediately scatter the mini marshmallows evenly over the hot brownie layer. Return to the oven for 3-4 minutes, just until the marshmallows puff up and turn lightly golden. Let the pie cool completely, then refrigerate for at least 2 hours.
Step 6
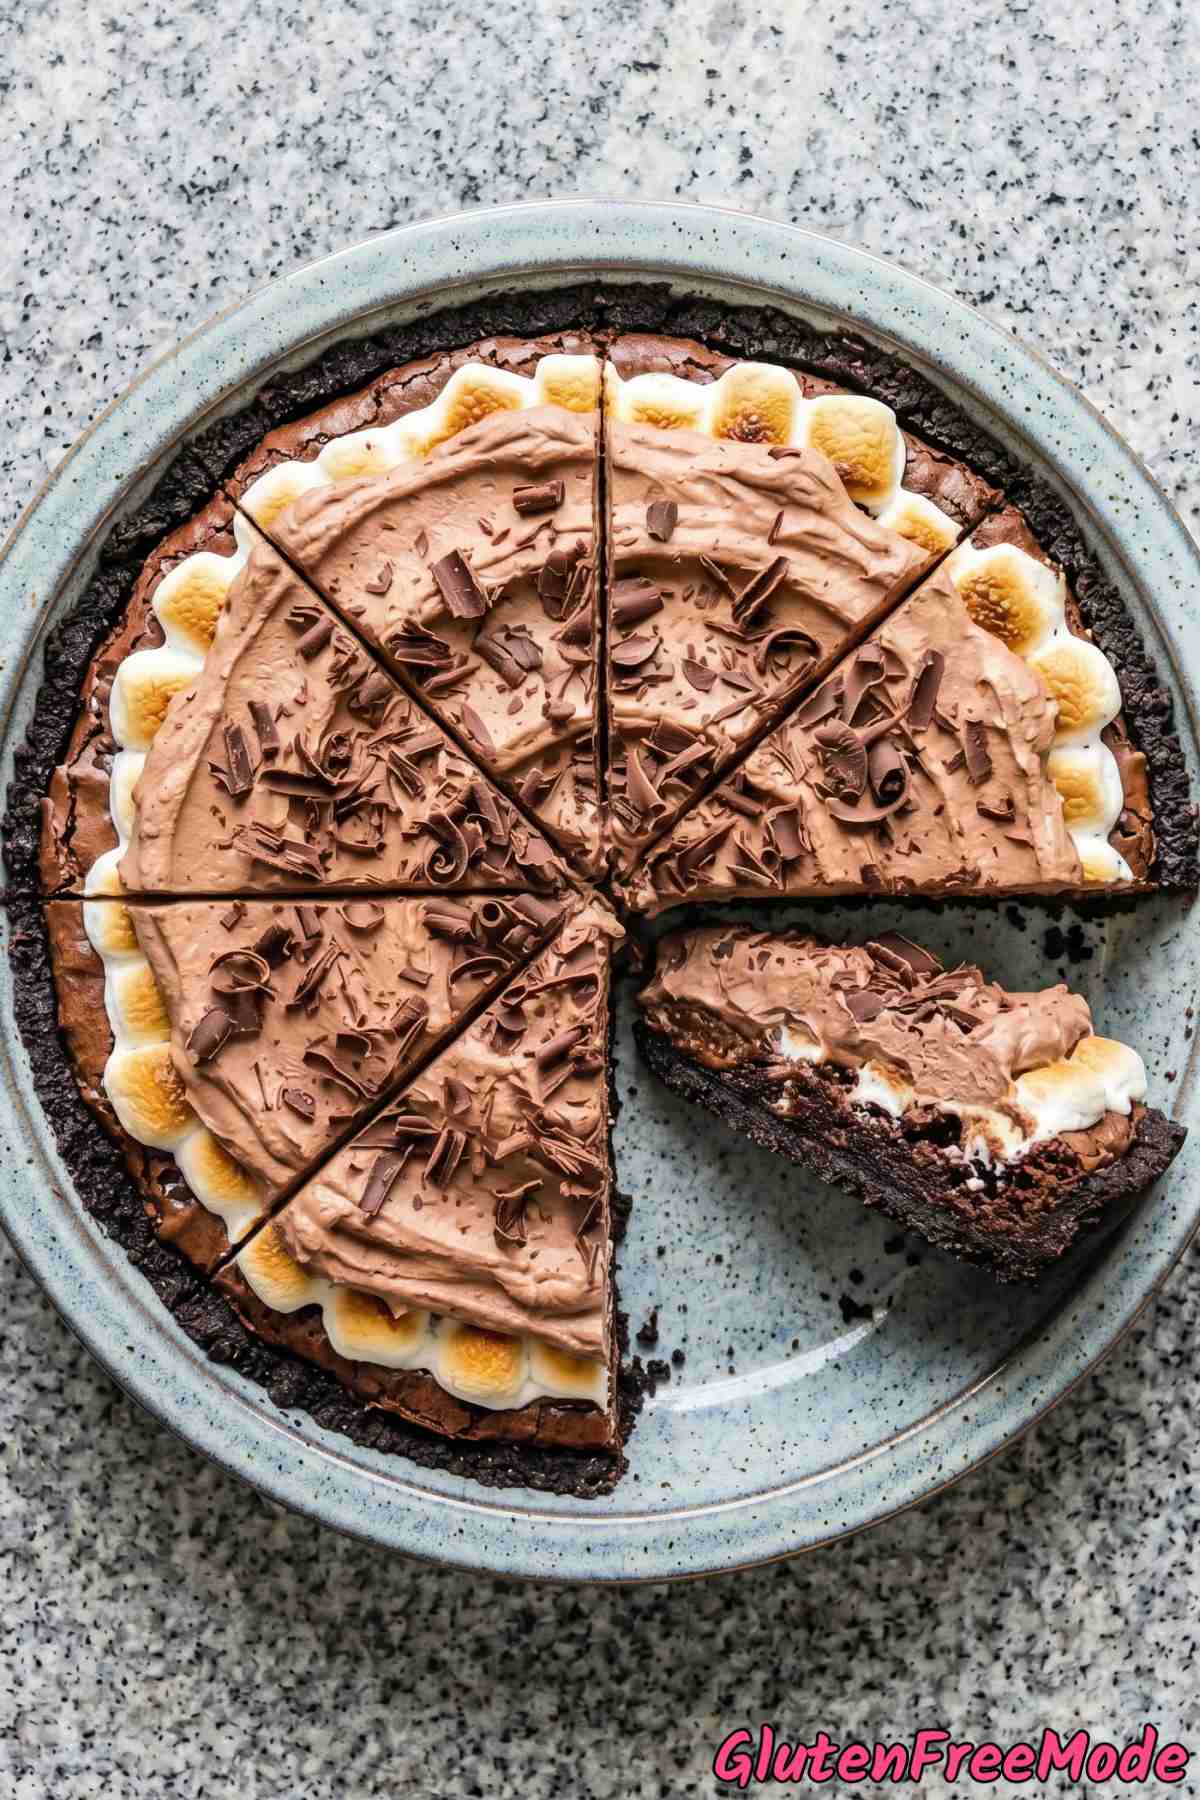
Using an electric mixer, whip the heavy cream, powdered sugar, and cocoa powder together until stiff peaks form. Spread or pipe the chocolate whipped cream over the marshmallow layer.
Step 7
Garnish with chocolate shavings and refrigerate for at least 30 minutes before slicing. Serve chilled.
Helpful Tips
Press the Crust Firmly and Evenly
When you press the cookie crumb mixture into the pie dish, really push it down hard with the bottom of a flat measuring cup or glass. You want it packed tight so it holds together when you slice the pie later.
Make sure the layer is even across the bottom and up the sides. If some spots are thinner than others, the crust will crumble apart right there when you try to serve a slice.
After baking for 8 minutes, let it cool a bit before adding the brownie batter. Pouring hot batter into a freshly baked crust is fine, but giving it even 5 minutes helps the crust firm up just enough to stay intact.
Melt the Chocolate Low and Slow
When you melt the butter and unsweetened chocolate together, keep your burner on the lowest setting and stir the whole time. Chocolate burns really easily, and once it seizes up or gets grainy there is no fixing it. You would have to start over.
Take the pan off the heat when there are still a few small pieces of chocolate that haven’t fully melted. The residual heat from the butter will finish the job as you keep stirring. This way you get a perfectly smooth, glossy mixture every time.
Don’t Overbake the Brownie Layer
Start checking the brownie layer at 25 minutes. You want it set around the edges but still a little soft and fudgy right in the center. It will continue to firm up as it cools, so pulling it out a touch early is better than leaving it in too long.
If you overbake it, you will end up with a dry, cakey brownie layer instead of that rich, fudgy texture that makes this pie so good. A toothpick inserted near the center should come out with a few moist crumbs on it, not totally clean.
Also keep in mind that gluten free 1-to-1 baking flour can sometimes set a little differently than regular flour. Every oven is a bit different too, so trust what you see more than the exact timer.
You Might Also Like
- Gluten Free Chocolate Truffle Torte
- Gluten Free German Chocolate Cake
- Gluten Free Peanut Butter Cup Pie
- Gluten Free Pecan Pie
- Gluten Free Triple Chocolate Brownies
Frequently Asked Questions
How do I know when the brownie layer is done but still fudgy?
The edges should look set and slightly pulled away from the crust, but the center should still have a very slight jiggle when you gently shake the pan. A toothpick inserted in the center should come out with moist crumbs clinging to it, not wet batter and not completely clean.
It’s better to pull it out a minute early than to overbake it, since the residual heat will continue cooking the brownie layer after you take it out of the oven.
Can I make this pie a day ahead?
Yes, and honestly it’s even better the next day. You can fully assemble the pie, including the chocolate whipped cream topping, and store it covered in the fridge for up to 24 hours before serving.
Just hold off on adding the chocolate shavings until right before you serve it so they look fresh and don’t get soggy from condensation in the fridge.
Gluten Free Mississippi Mud Pie

Equipment
- electric mixer
- 9-inch pie dish
Ingredients
For the Crust
- 2 cups Gluten Free Chocolate Sandwich Cookie Crumbs (about 24 cookies)
- 5 tbsp Unsalted Butter, melted
For the Brownie Layer
- 1/2 cup Unsalted Butter
- 4 oz Unsweetened Chocolate, chopped
- 1 cup Granulated Sugar
- 2 Large Eggs
- 1 tsp Vanilla Extract
- 1/2 cup Gluten Free 1-to-1 Baking Flour
- 1/4 tsp Salt
For the Topping
- 2 cups Mini Marshmallows
- 1 1/2 cups Heavy Whipping Cream
- 3 tbsp Powdered Sugar
- 2 tbsp Unsweetened Cocoa Powder
- Chocolate Shavings, for garnish
Instructions
- Preheat your oven to 350°F. In a bowl, stir together the gluten free chocolate cookie crumbs and melted butter until evenly moistened. Press the mixture firmly into the bottom and up the sides of a 9-inch pie dish. Bake for 8 minutes, then remove and set aside.
- For the brownie layer, melt the butter and chopped unsweetened chocolate together in a saucepan over low heat, stirring constantly until smooth. Remove from heat and let cool for 5 minutes.
- Whisk the granulated sugar, eggs, and vanilla extract into the chocolate mixture until smooth. Fold in the gluten free 1-to-1 baking flour and salt until just combined.
- Pour the brownie batter into the pre-baked crust and bake for 25-28 minutes, until the brownie layer is set but still slightly fudgy in the center.
- Remove the pie from the oven and immediately scatter the mini marshmallows evenly over the hot brownie layer. Return to the oven for 3-4 minutes, just until the marshmallows puff up and turn lightly golden. Let the pie cool completely, then refrigerate for at least 2 hours.
- Using an electric mixer, whip the heavy cream, powdered sugar, and cocoa powder together until stiff peaks form. Spread or pipe the chocolate whipped cream over the marshmallow layer.
- Garnish with chocolate shavings and refrigerate for at least 30 minutes before slicing. Serve chilled.