Sugar cookies are one of those classic recipes that everyone should be able to enjoy. Today I’m sharing my gluten free classic sugar cookies that taste just as good as the regular version.
These cookies are soft, sweet, and perfect for decorating with a simple icing. They hold their shape well after baking, which is exactly what you want when you’re using cookie cutters.

The recipe uses gluten free 1-to-1 baking flour, which makes things really simple. No need to blend different flours or add xanthan gum separately.
A touch of almond extract along with vanilla gives these cookies a really nice flavor that sets them apart. It’s a small detail but it makes a big difference.
Whether you’re making them for a holiday, a birthday, or just because, these gluten free sugar cookies are a great one to have in your recipe collection.
Why You’ll Love This Recipe
They Taste Just Like Regular Sugar Cookies – These gluten free sugar cookies have the same buttery, sweet flavor and soft texture as the classic version. Nobody will even guess they are gluten free, which makes them perfect for sharing with everyone.
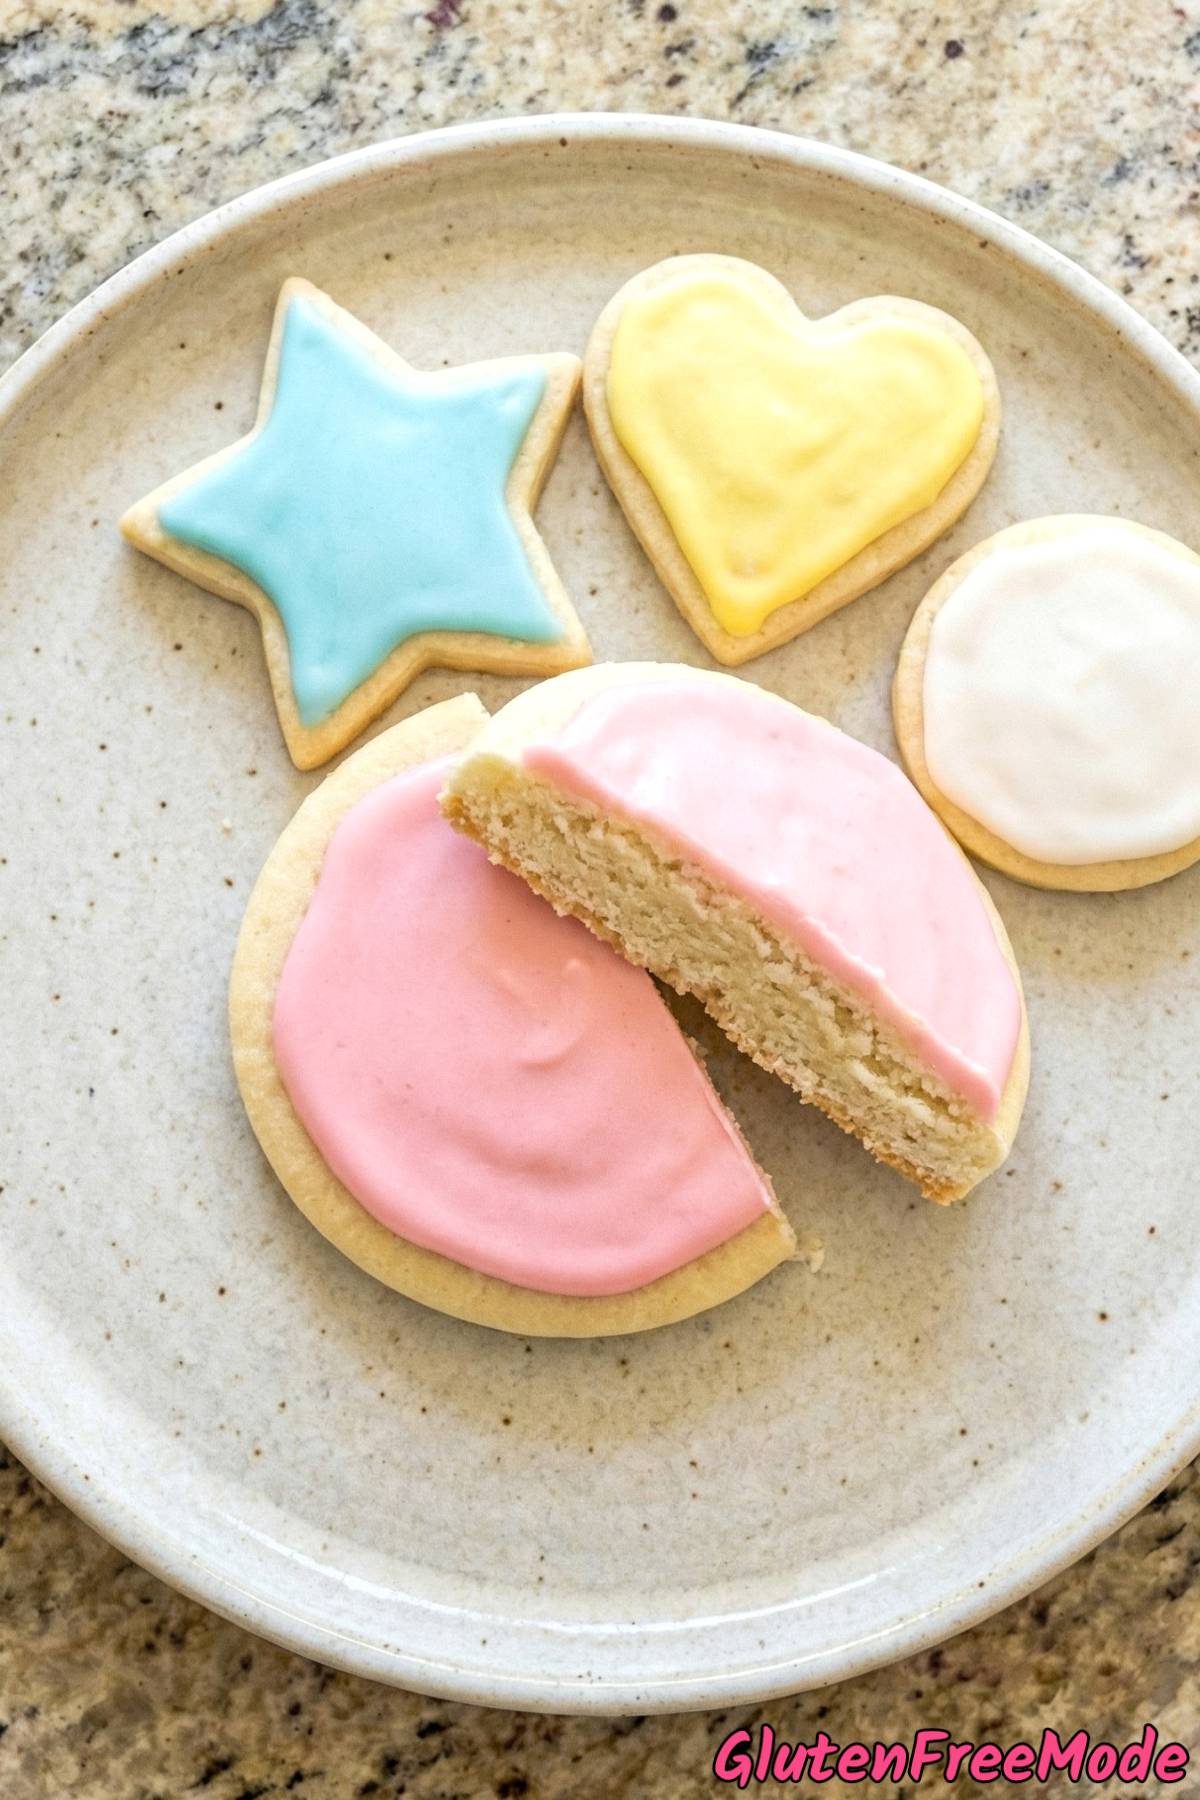
Perfect for Decorating – The simple vanilla icing is easy to customize with food coloring, so you can decorate these cookies for any holiday or occasion. Kids and adults alike will love getting creative with different shapes and colors.

The Almond Extract Makes a Difference – That little bit of almond extract mixed with vanilla gives these cookies a subtle bakery-style flavor that most homemade sugar cookies are missing. It is a small detail that takes them to the next level.
The Dough Holds Its Shape – One of the biggest struggles with gluten free cookie dough is that it spreads too much or falls apart. This dough rolls out smoothly and keeps the shape of your cookie cutters beautifully after baking.
Ingredients
- 2 1/2 cups Gluten Free 1-to-1 Baking Flour
- 1 tsp Baking Powder
- 1/2 tsp Salt
- 1 cup Unsalted Butter, softened
- 1 cup Granulated Sugar
- 1 large Egg
- 1 1/2 tsp Vanilla Extract
- 1/2 tsp Almond Extract
For the Icing
- 2 cups Powdered Sugar
- 2 tbsp Whole Milk
- 1/2 tsp Vanilla Extract
- Food Coloring (optional)
How to Make
Step 1
Whisk together gluten free flour, baking powder, and salt in a bowl. In a large bowl, beat softened butter and sugar until light and fluffy, about 3 minutes. Add egg, vanilla extract, and almond extract and beat until combined.
Step 2
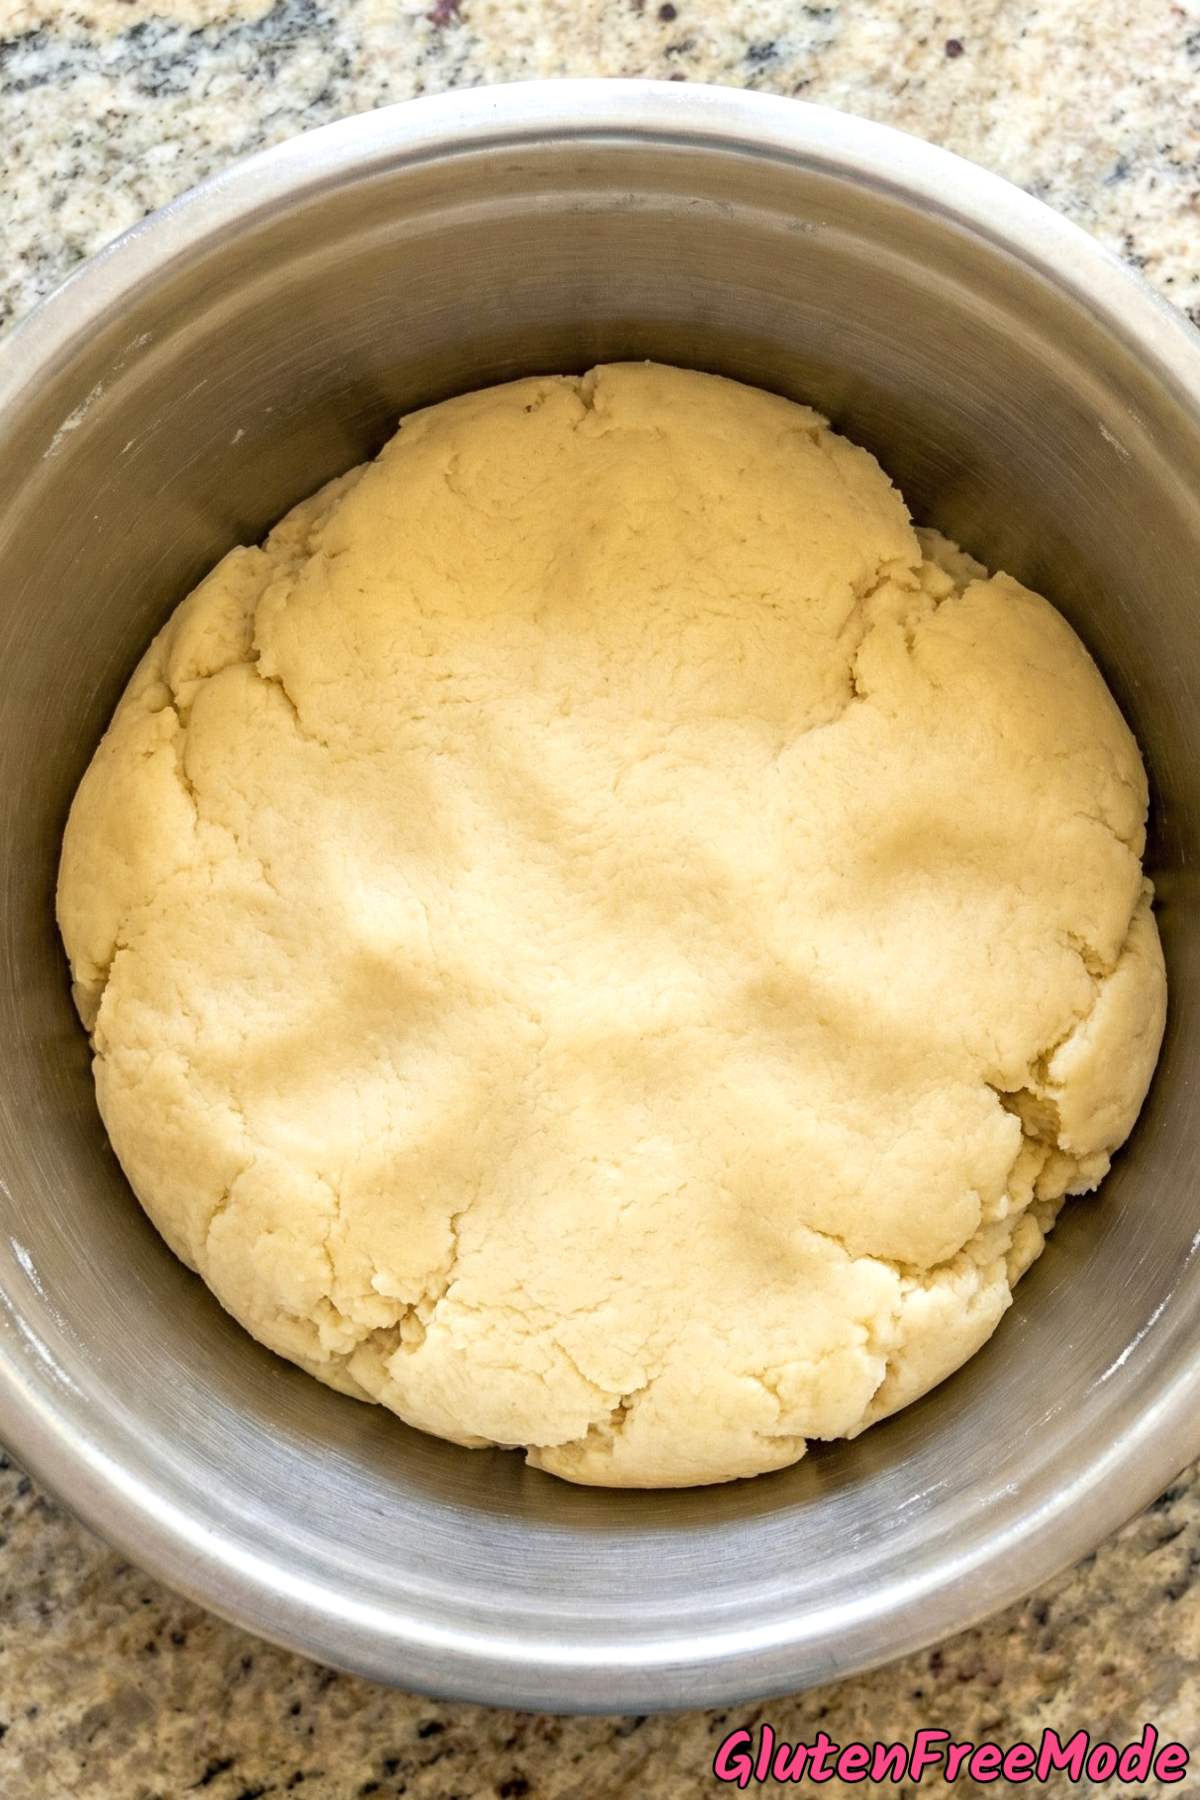
Gradually mix the dry ingredients into the butter mixture until a soft dough forms. Divide dough in half, flatten each into a disc, wrap in plastic, and refrigerate for at least 1 hour.
Step 3
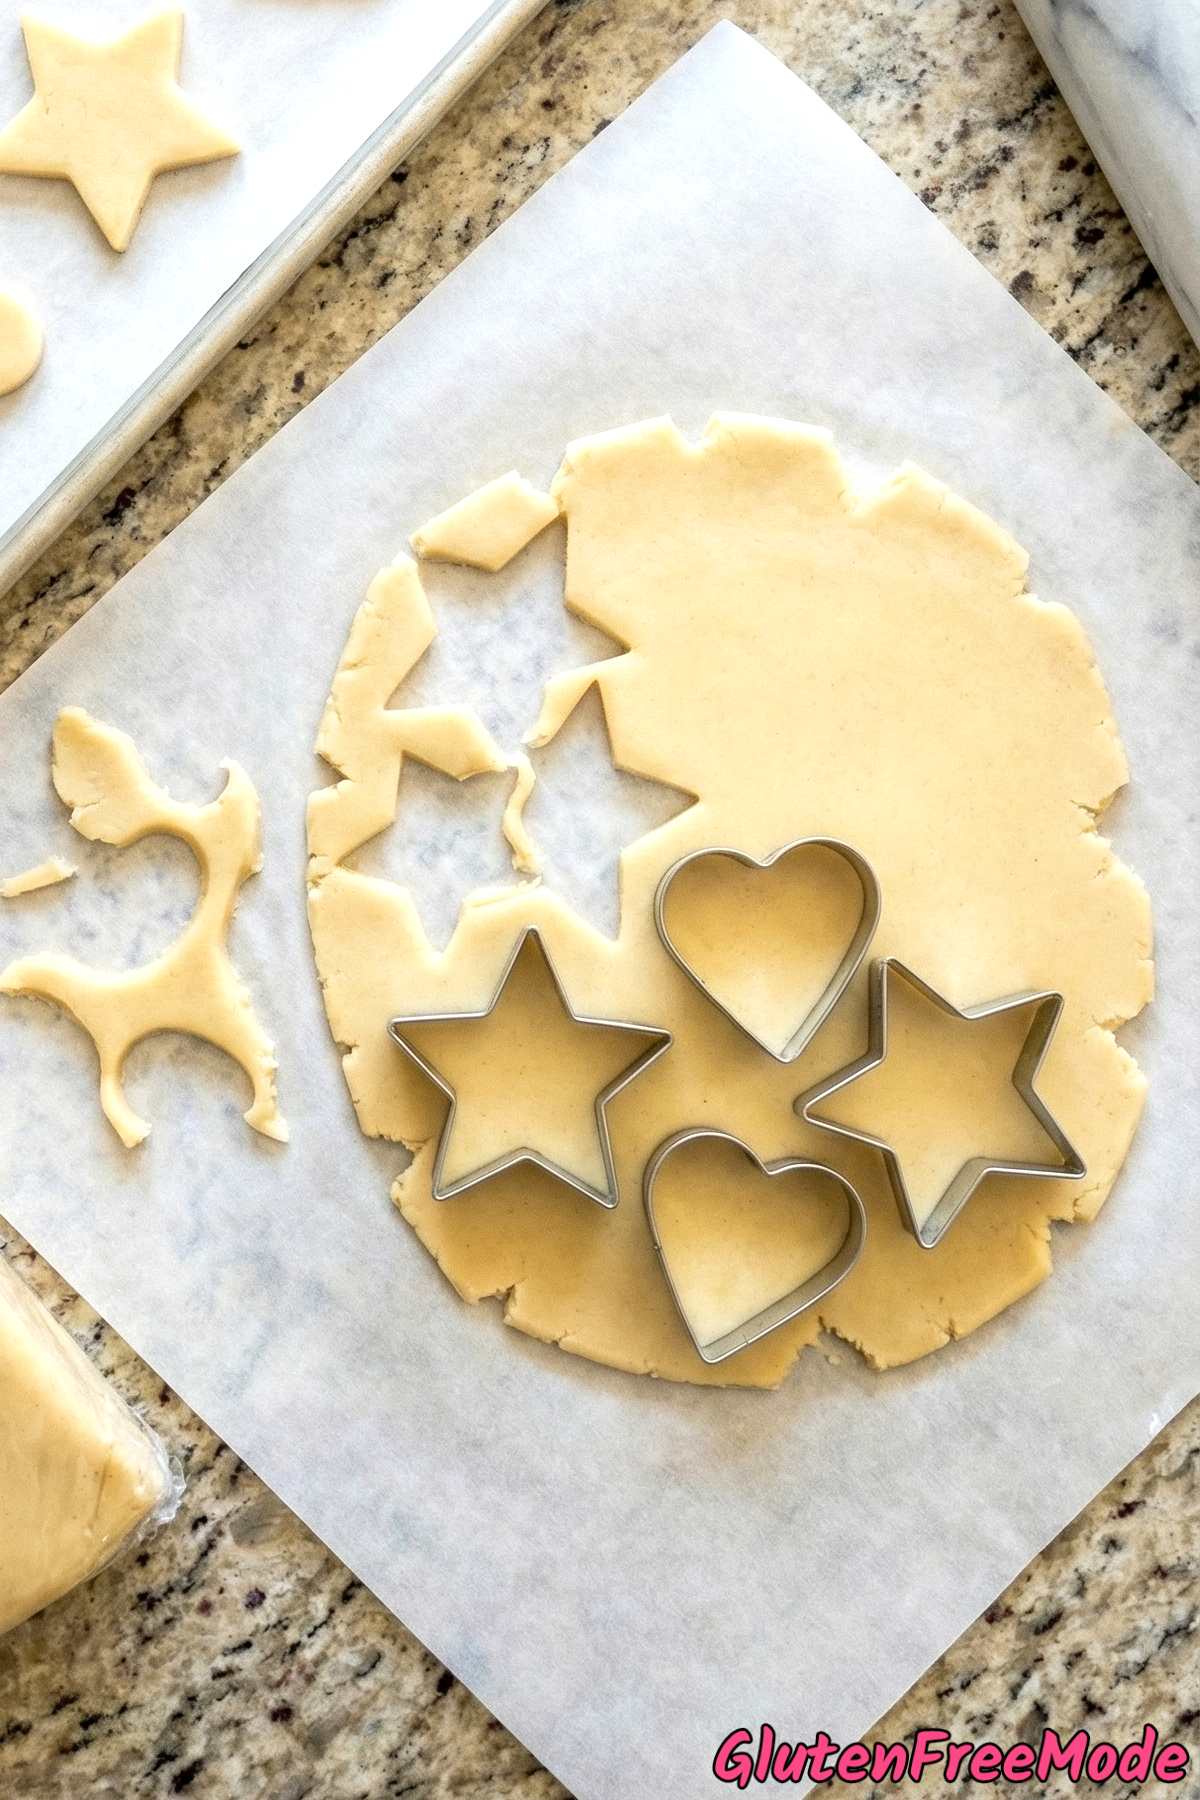
Preheat oven to 350F and line baking sheets with parchment paper. Roll out one dough disc between two sheets of parchment paper to about 1/4-inch thickness. Cut into shapes with cookie cutters and place 1 inch apart on baking sheets.
Step 4
Bake for 9 to 11 minutes until the edges are barely golden but the centers still look slightly underdone. Let cool on the baking sheet for 5 minutes, then transfer to wire racks to cool completely.
Step 5
For the icing, whisk together powdered sugar, milk, and vanilla extract until smooth. Add food coloring if desired. Spread or pipe icing onto cooled cookies and let set for 20 minutes before serving.

Helpful Tips
Use a Good Gluten Free 1-to-1 Flour
Not all gluten free flours work the same way. For this recipe, you need a 1-to-1 baking flour that already has xanthan gum in it. Check the ingredients on the bag before you start. Brands like Bob’s Red Mill 1-to-1 or King Arthur Measure for Measure work well here.
If your flour doesn’t contain xanthan gum, your dough won’t hold together properly and your cookies will spread out flat and crumble apart. That one ingredient is what replaces the “glue” that gluten normally provides.
Also, spoon the flour into your measuring cup and level it off with a knife instead of scooping directly from the bag. Scooping packs the flour down and you’ll end up with too much, which makes the cookies dry and dense.
Get the Butter to the Right Softness
The butter needs to be softened but not melty or greasy. The best way to tell is to press your finger into it. It should leave a dent without your finger going straight through. If the butter still feels cold and firm in the center, give it more time.

Set it out on the counter about 45 minutes to an hour before you start baking. If you forgot to take it out ahead of time, cut it into small cubes and spread them out on a plate. They’ll soften up in about 15 to 20 minutes that way.
Don’t microwave it to speed things up. It almost always melts part of it while the rest stays cold, and melted butter changes the whole texture of the dough. Your cookies will spread too much and won’t hold their shape after you cut them out.
Don’t Skip the Chilling Step
Refrigerating the dough for at least one hour is not optional with this recipe. Gluten free dough is softer and stickier than regular dough, so it needs that time in the fridge to firm up enough to roll out and cut shapes without everything falling apart.
If you try to roll it out right away, it will stick to everything and the shapes won’t come out clean. If you have time, chilling it for two hours or even overnight works even better. The cookies will hold their shape more during baking.
When you take the dough out, if it feels rock hard, let it sit on the counter for about 5 to 10 minutes before you try to roll it. You want it firm but not impossible to work with.
You Might Also Like
- Gluten Free Soft Snickerdoodle Cookies
- Gluten Free Chocolate Chip Cookies
- Gluten Free Soft Baked Funfetti Cookies
- Gluten Free White Chocolate Macadamia Nut Cookies
Frequently Asked Questions
Can I skip the almond extract?
Yes, you can leave out the almond extract if you have a nut allergy or just don’t like the flavor. The cookies will still taste great with vanilla extract alone.
If you want to replace it with something else, you could add an extra half teaspoon of vanilla extract or try a small amount of lemon zest for a fresh twist.
Why do I need to refrigerate the dough for an hour?
Chilling the dough firms up the butter, which makes it much easier to roll out and cut into shapes without everything sticking to your counter or rolling pin. If you skip this step, the dough will be too soft and sticky to work with.
If you’re in a hurry, you can pop the wrapped dough discs in the freezer for about 20 to 25 minutes instead. Just make sure the dough is firm but not rock hard before you try to roll it out.
Gluten Free Classic Sugar Cookies

Equipment
- cookie cutters
- wire racks
Ingredients
- 2 1/2 cups Gluten Free 1-to-1 Baking Flour
- 1 tsp Baking Powder
- 1/2 tsp Salt
- 1 cup Unsalted Butter, softened
- 1 cup Granulated Sugar
- 1 large Egg
- 1 1/2 tsp Vanilla Extract
- 1/2 tsp Almond Extract
For the Icing
- 2 cups Powdered Sugar
- 2 tbsp Whole Milk
- 1/2 tsp Vanilla Extract
- Food Coloring (optional)
Instructions
- Whisk together gluten free flour, baking powder, and salt in a bowl. In a large bowl, beat softened butter and sugar until light and fluffy, about 3 minutes. Add egg, vanilla extract, and almond extract and beat until combined.
- Gradually mix the dry ingredients into the butter mixture until a soft dough forms. Divide dough in half, flatten each into a disc, wrap in plastic, and refrigerate for at least 1 hour.
- Preheat oven to 350F and line baking sheets with parchment paper. Roll out one dough disc between two sheets of parchment paper to about 1/4-inch thickness. Cut into shapes with cookie cutters and place 1 inch apart on baking sheets.
- Bake for 9 to 11 minutes until the edges are barely golden but the centers still look slightly underdone. Let cool on the baking sheet for 5 minutes, then transfer to wire racks to cool completely.
- For the icing, whisk together powdered sugar, milk, and vanilla extract until smooth. Add food coloring if desired. Spread or pipe icing onto cooled cookies and let set for 20 minutes before serving.